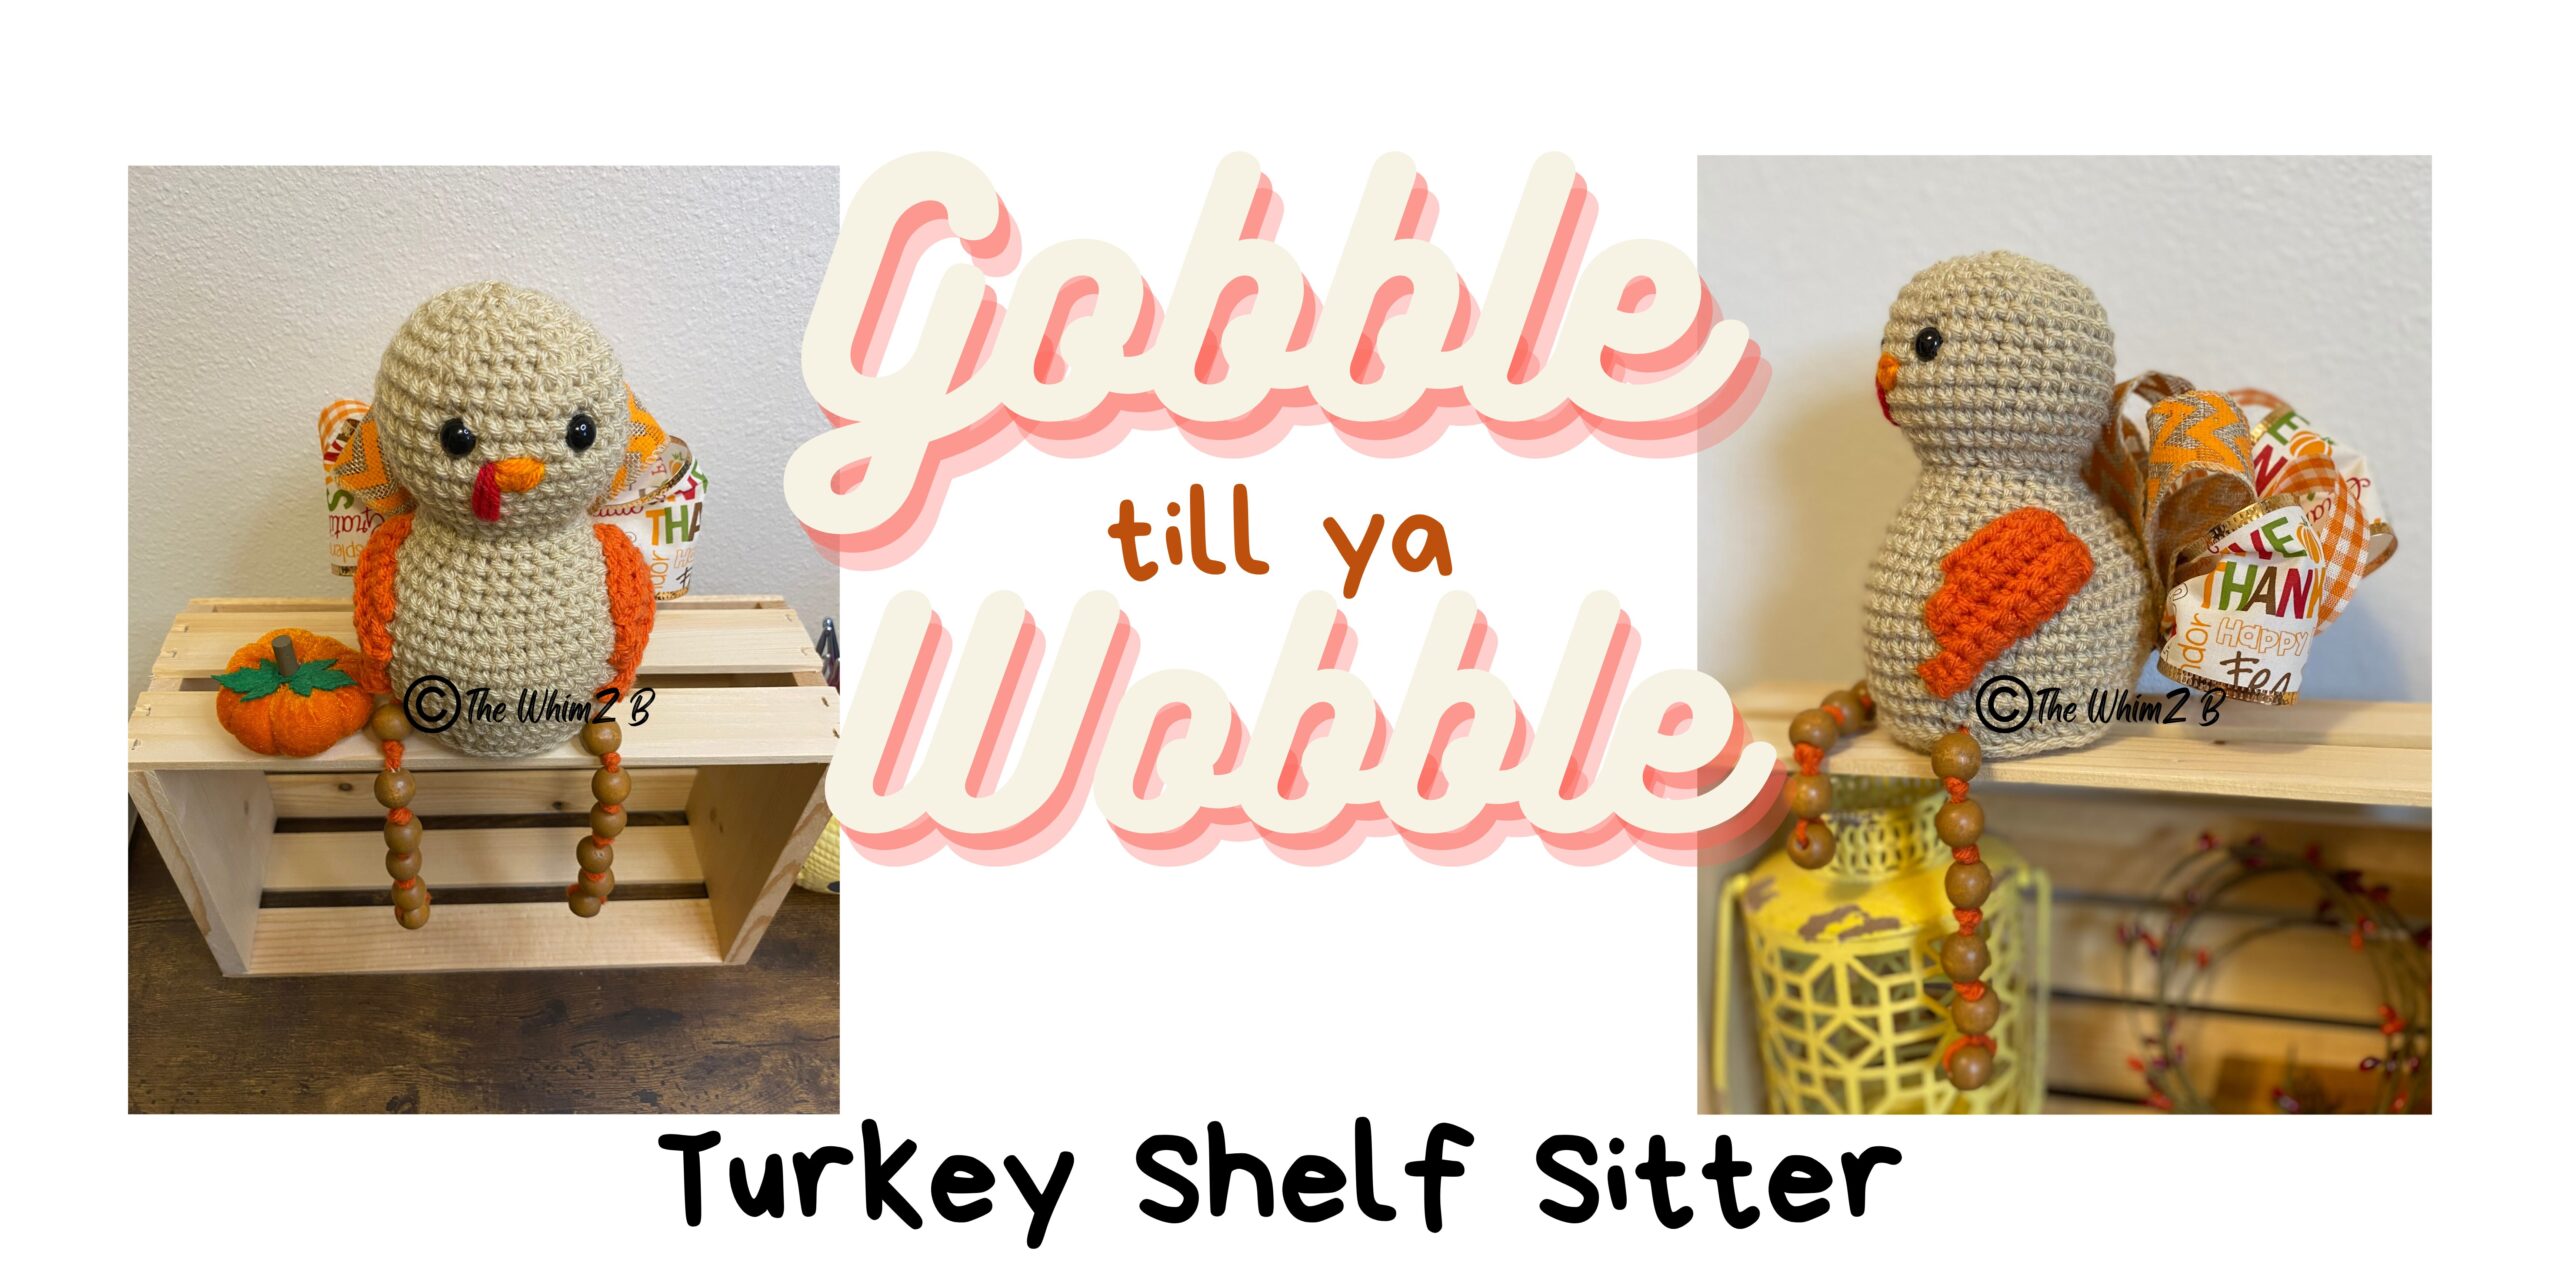
Free Turkey Crochet Pattern: Easy Shelf Sitter Tutorial for Thanksgiving Decor
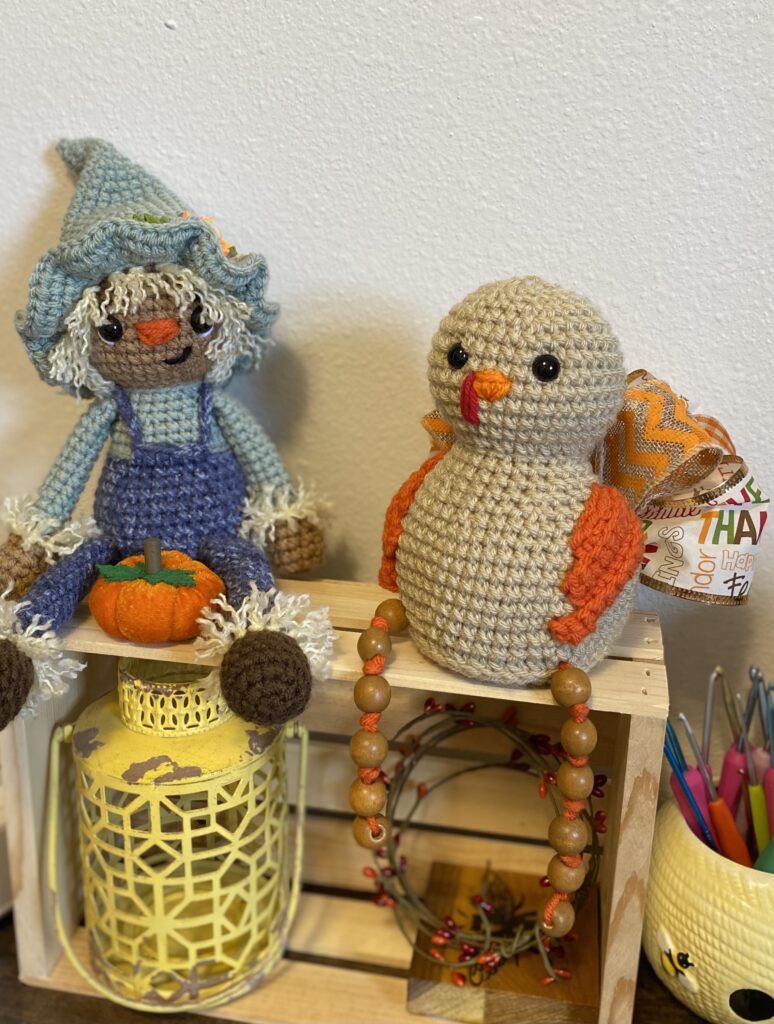
Looking for a fun, festive project to add to your Thanksgiving decor? You’re in the right place! This free turkey crochet pattern is perfect for beginners and experienced makers alike. With simple stitches, dangling legs and just a touch of ribbon for flair, you’ll have a cute turkey shelf sitter ready in no time.
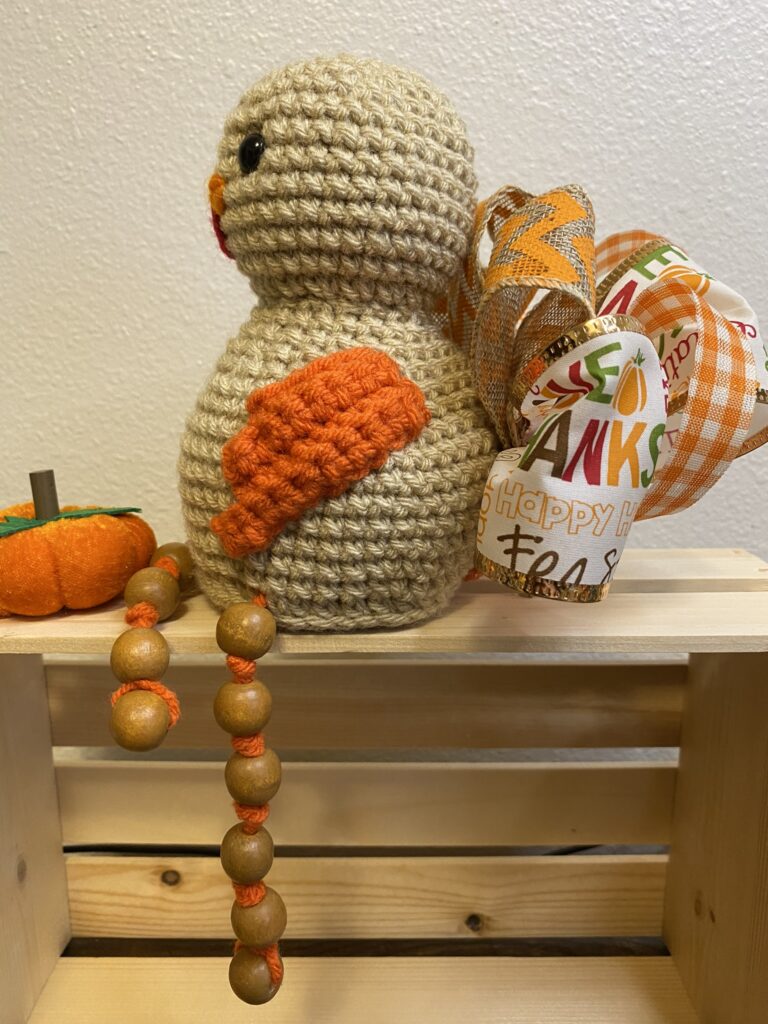
I love this adorable little crochet turkey with a plume of gorgeous tail feathers crafted from various seasonal ribbons. He can be made quickly and easily without breaking the bank (because you will be doing that when you buy those groceries for your Thanksgiving feast 😅!)
To make this cutie, I actually used yarn and weights I had on hand and the other supplies I got from The Dollar Tree.
I think this pattern would be great for a beginner crocheter! It uses simple stitches and amigurumi techniques. AND…. I have a YouTube playlist to accompany it!
Let’s get to it!
Materials Needed:
- 3.75mm (F) hook
- Yarn: 4/ medium weight
- Main body color (color A)
- Wing/beak/legs color (color B)
- Red for snood
- Stuffing
- Yarn needle
- Stitch marker
- Safety eyes 10mm (optional)
- Ribbon in 3 different widths. The two widest must be wired. (I used: 2.5”(wired), 1.5”(wired) and ⅝”)
- 12 Wooden beads I used these from the Dollar Tree
- A base such as a canning jar lid or plastic piece
- Weights and something to put them in (I used poly beads and a nylon footie)
- Hot glue
**When doing decreases, the Invisible Decrease is recommended
**The Yarn Under/Yarn Over method is recommended for the turkey body. The normal Yarn Over/Yarn Over method will be used for the wings and tail cover.
**Pattern for the body is worked in the round with no joins. Use a stitch marker.
Body
With color A
R1: MR 6SC (6)
R2: INC around (12)
R3: *SC, INC* around (18)
R4: *SCx2, INC* around (24)
R5: *SCx3, INC* around (30)
R6: *SCx4, INC* around (36)
R7: In BLO, SC around (36)
R8: *SCx5, INC* around (42)
R9: SCx3, INC (SCx6, INC)x5 , SCx3 (48)
R10-14: SC around (48)
R15: SCx3, DEC (SCx6, DEC)x5, SCx3 (42)
R16: *SCx5, DEC* around (36)
Place lid into base. (optional; you may want to glue it in. I did not.)
R17: SCx3, DEC (SCx4, DEC)x5, SCx3 (30)
R18-19: SC around (30)
R20: *SCx3, DEC* around (24)
R21: SC, DEC (SCx2, DEC)x5, SC (18)
R22: INC around (36)
Add in gems and stuffing.
R23-29: SC around (36)
If using safety eyes, add between R27 & R28, 5 visible sts apart.
R30: SCx2, DEC (SCx4, DEC)x5, SCx2 (30)
R31: *SCx3, DEC* around (24)
R32: SC, DEC (SCx2, DEC)x5, SC (18)
R33: *SC, DEC* around (12)
R34: DEC around (6)
Cut a tail and using a needle, weave the end through the front loops of R34. Pull tight to close. Tie off and weave through the top of head a few times. Trim.
Beak and Snood
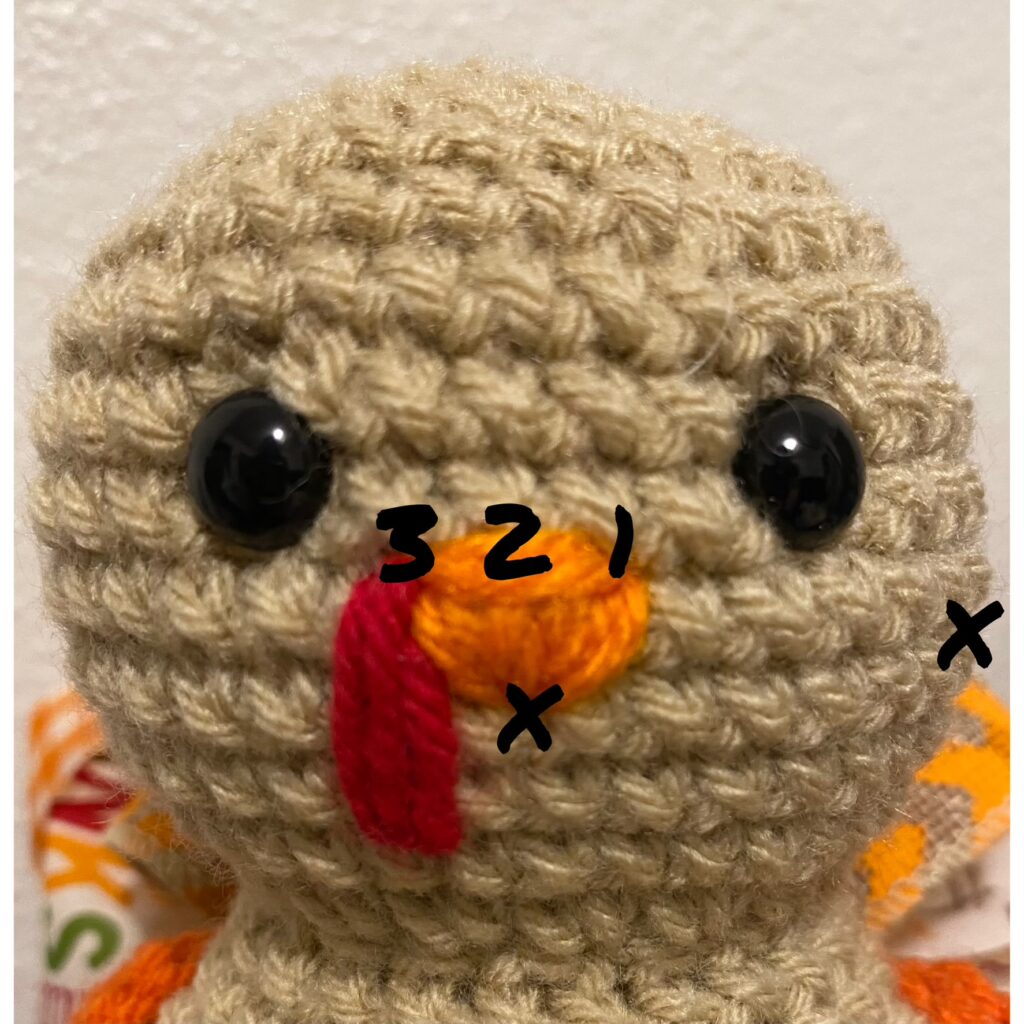
For the BEAK, you will be working between R25-26 and R26-27. Insert yarn into side of head (x) and come out at the X which is between R25-26; centered between the eyes. This will be your center point to come back to each time. You will go to each number twice. Then stitch between 3 &1 a couple of times. When finished, exit the head at the same hole you entered in. Tie yarn ends together. Re-thread in needle and pull ends and knot into stuffing and come out at the back of the head. Pull yarn taut and trim.
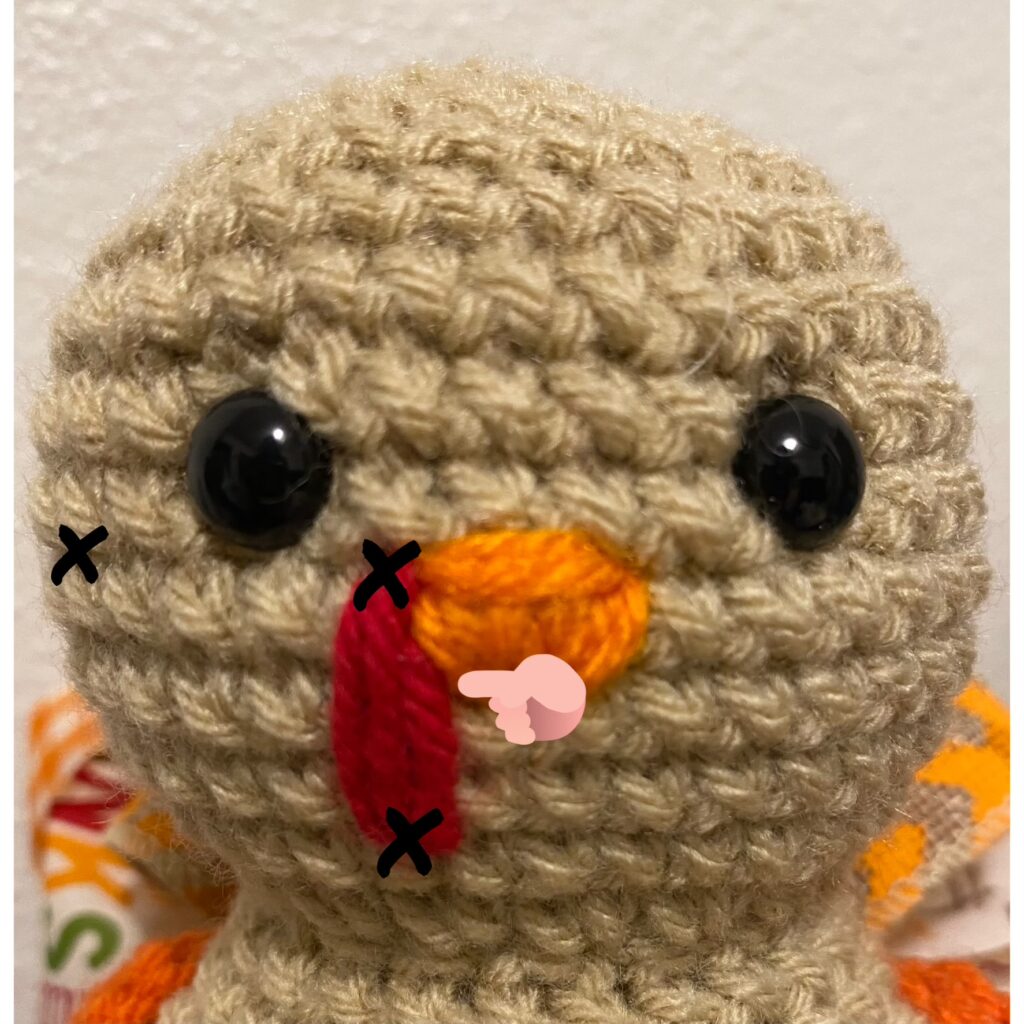
For the SNOOD, insert your red yarn into the opposite side of the head (x) and come out at the top left corner (x) of the beak. Insert needle into the parallel stitch 3 rounds down. Go back up to beginning point and make another stitch. This time exit 1 round below (where the hand is pointing) and go into the same stitch. Exit the head at the same hole you entered in. Tie yarn ends together. Re-thread in needle and pull ends and knot into stuffing and come out at the back of the head. Pull yarn taut and trim.
Wings
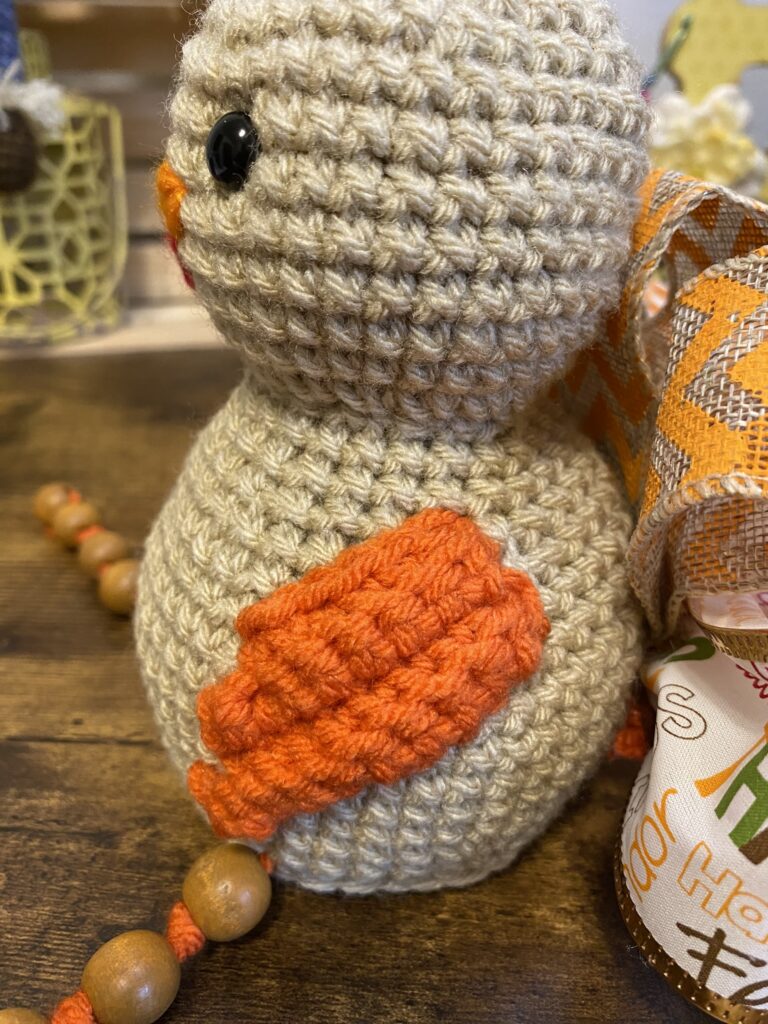
With color B; make 2
Row 1: Ch11. SC in second ch from hook and in the next 9 chs. Turn. (10)
Row 2: Ch1. SC in the BLO of the same st and in the next 7 sts. Turn. (8)
Row 3: Ch1. SC in the same st and in the next 7 sts. Turn. (8)
Row 4: Ch1. SC in the BLO of the same st and in the next 5 sts. (6)
Cut long tail and sew onto body using the photo above.
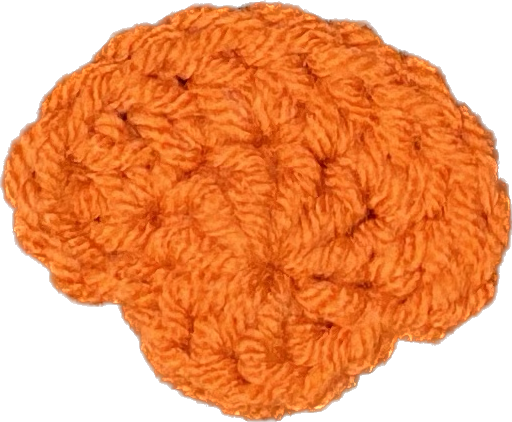
Tail Feather Cover
With color B
R1: MR 10 DC. Join. (10)
R2: DC in same st. INC in next st. DC, INC 3 more times. Ch2 and SlSt into same st. (13) Pull to back and tie with MR tail. Trim.
Set aside for later.
Legs:
With color B: cut 2 lengths of yarn 26-28″. Thread one bead onto one yarn piece and center it. Tie a loose double knot. This forms the turkey foot. Thread both ends of the yarn into the needle and add 5 more beads with a loose double knot after each one.
After the last double knot, it’s time to attach the leg to the body. You will insert needle into turkey body at the top of R7 and right below the wing tip. Come out somewhere in the wing. You can either thread each yarn end separately, and then come up one stitch apart… or together and then separate and pull other end one stitch over (see video for clearer instructions). Tie ends together. Pull ends together and come out in another part of the wing. Pull taut and trim. If you have a lot of yarn left after attaching the legs, you can just thread each end separately through the body (like you did for the beak) and trim.
Tail Feathers
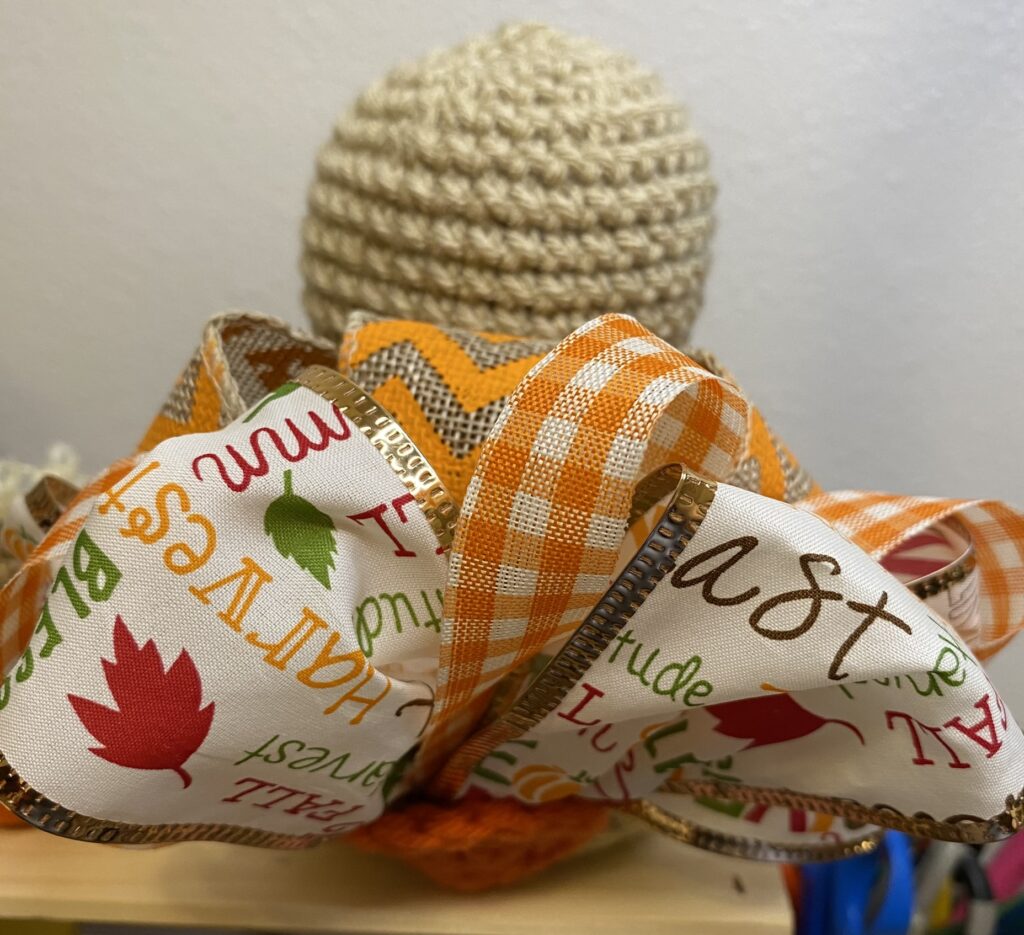
Cut ribbons:
2 ½” ribbon: Cut (1) 16in. Cut (2) 8in.
1 ½” ribbon: Cut (3) 8in.
⅝”ribbon: Cut (3) 8in.
I always singe the ends of my ribbons with a lighter to keep them from unraveling. You will be using your hot glue gun to assemble and attach the tail. Refer to THIS VIDEO on how to assemble the tail ribbons.
That’s it!
I hope you enjoyed making this turkey shelf sitter using the free turkey crochet pattern! If you did, I can’t wait to see your creations—please tag me on social media so I can admire your handiwork. Hungry for more crochet fun? Check out my other free patterns here on my blog. Looking for more Fall themed crafts and crochet? Enjoy these other projects.