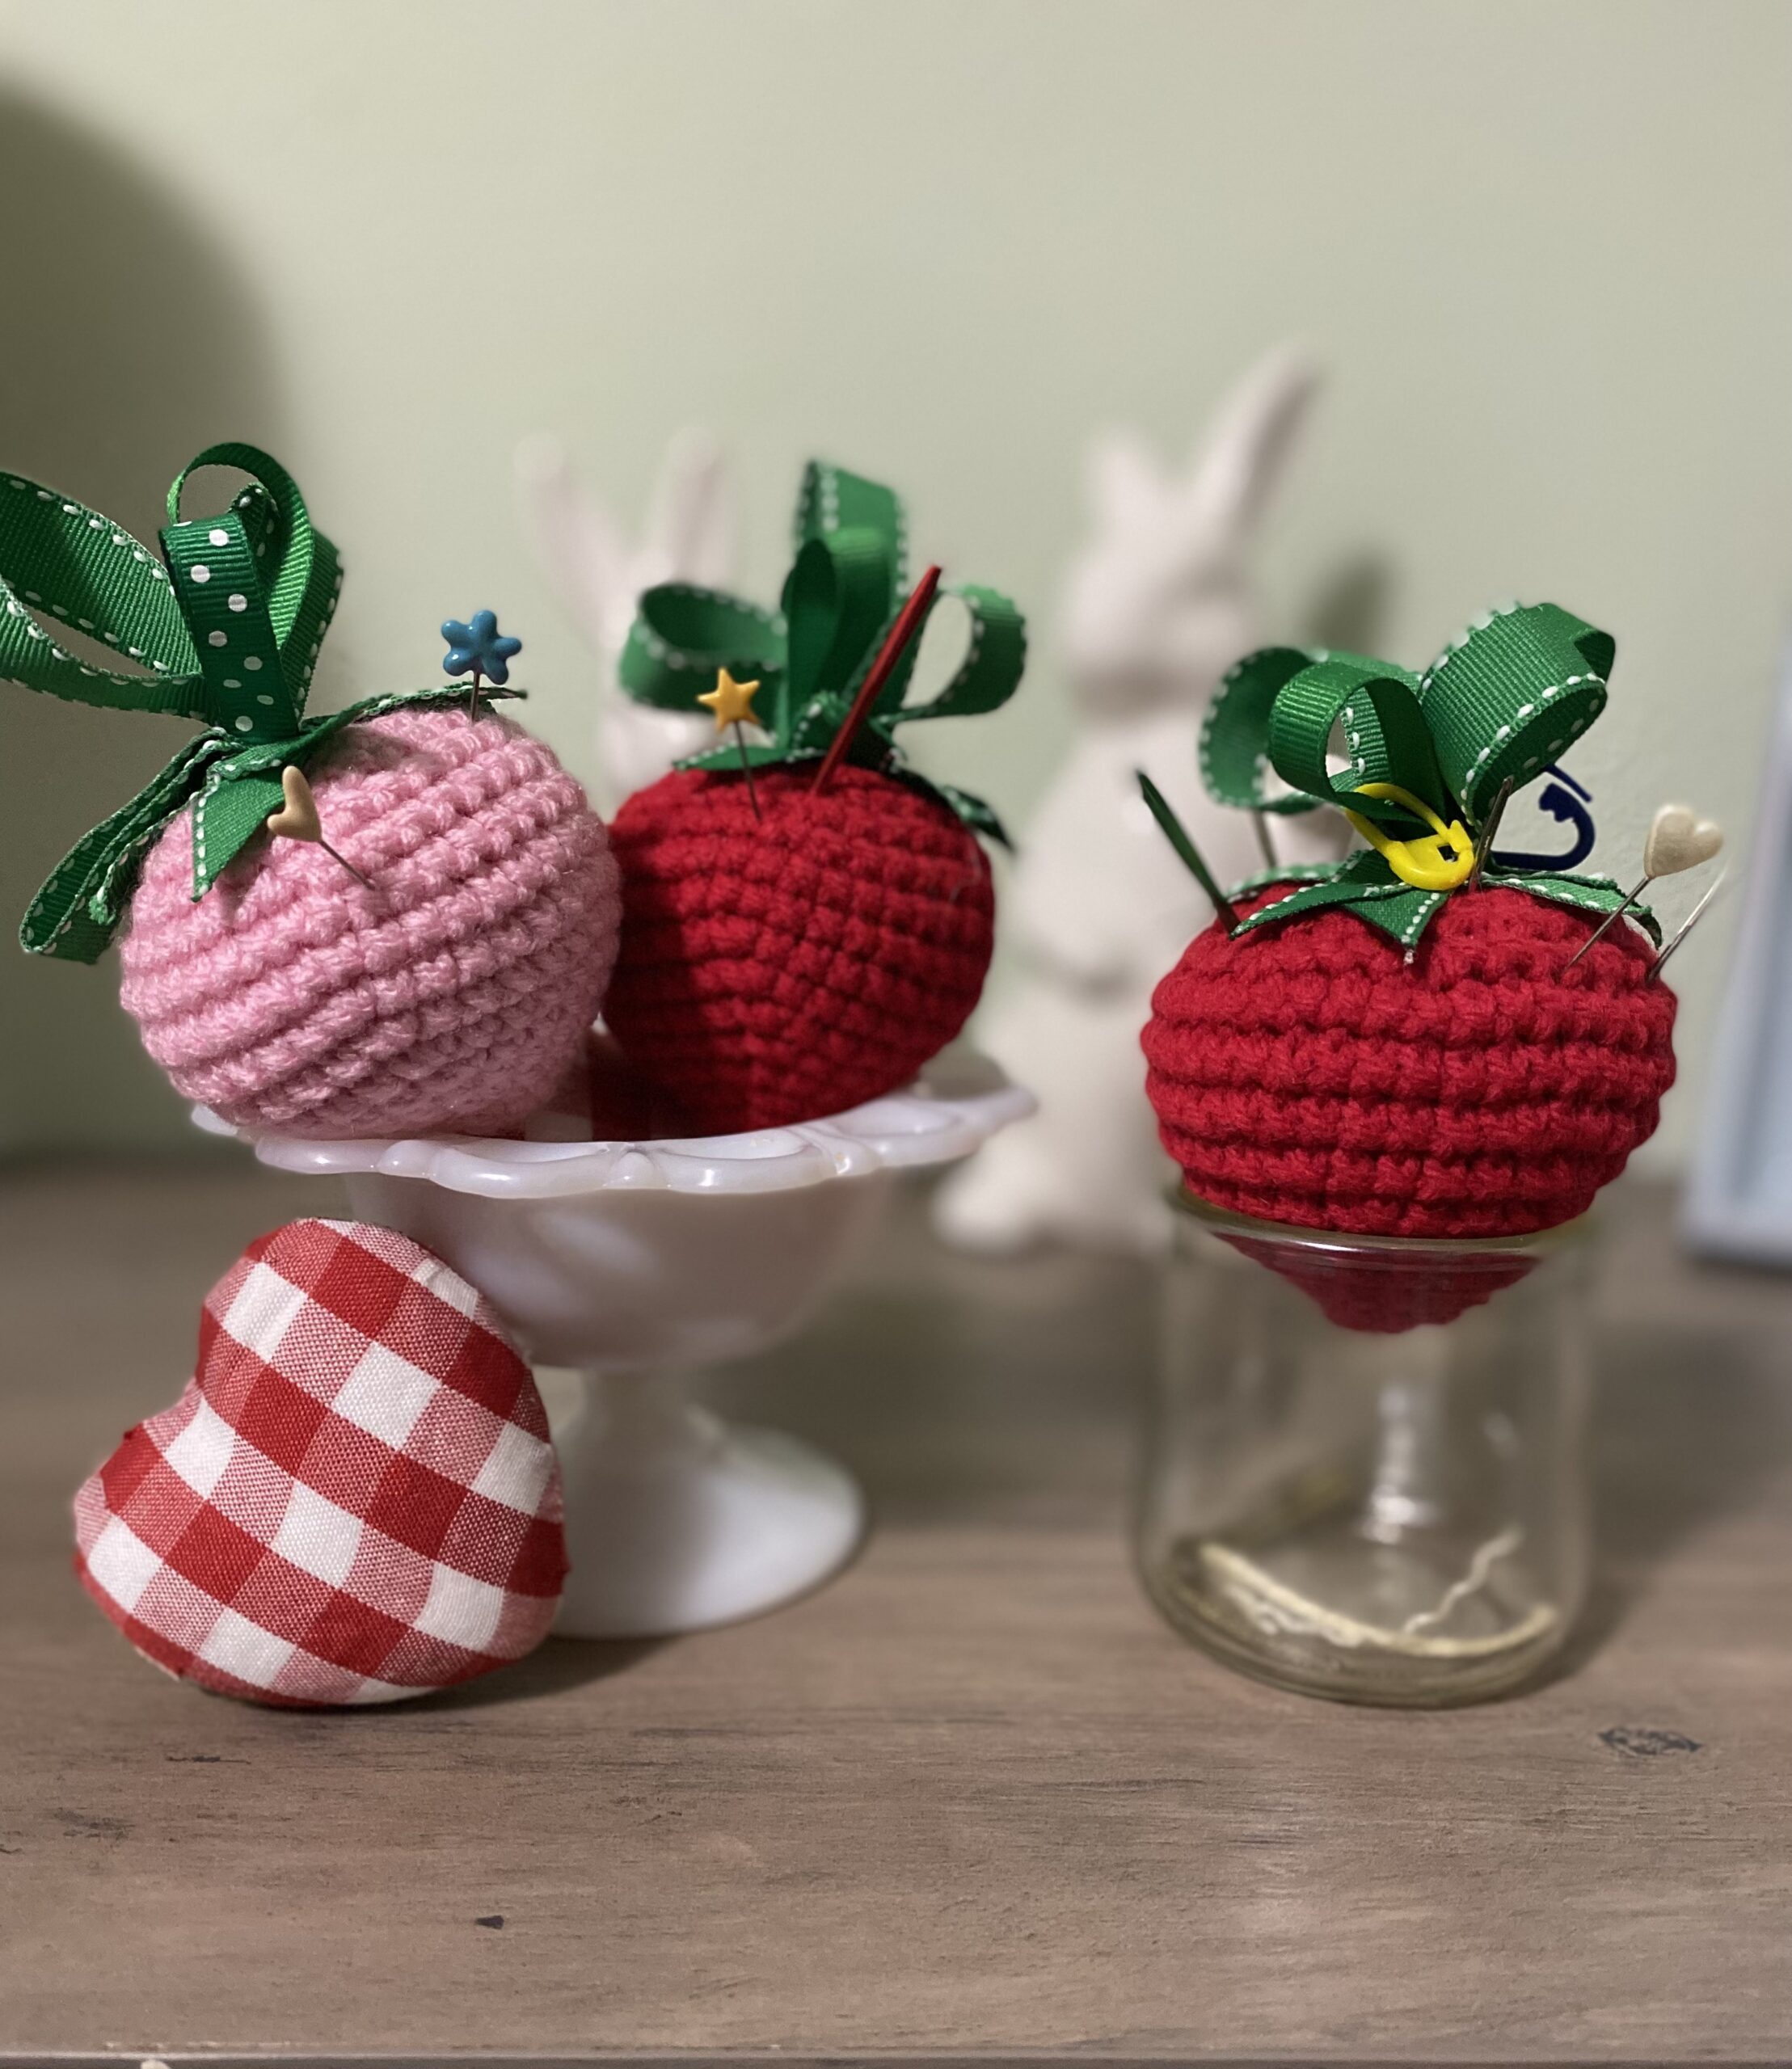
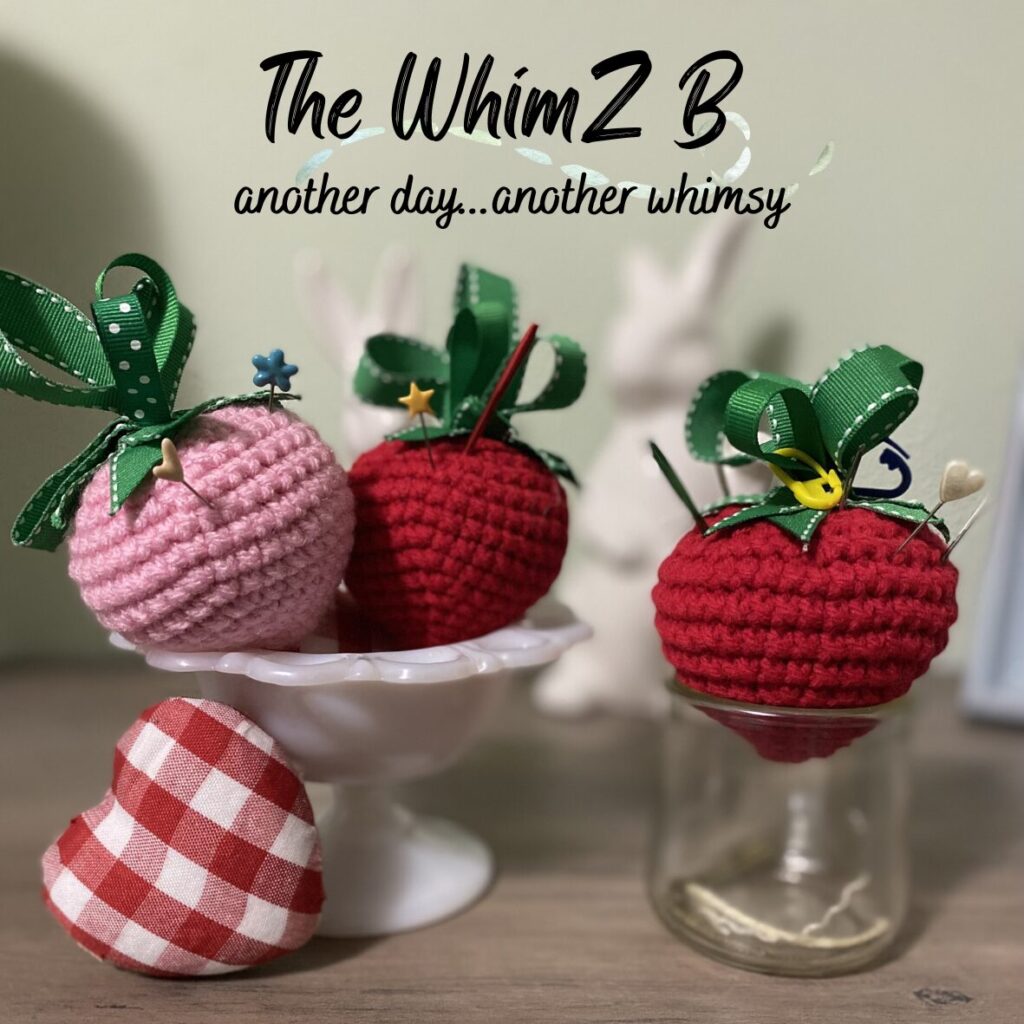
Crocheted Strawberry Pincushion Pattern
Have you been looking for a cute pincushion to hold those thicker yarn needles or regular pins? Or maybe you need a fast, adorable gift for someone. Then you, my friend, are in the right place! This sweet crocheted strawberry pincushion pattern is the answer to your problem.
This pattern was originally published on my old blog. It came into fruition out of my personal need for a pincushion to hold my bent tip needles. At the same time, I was using a small OUI yogurt jar to put my yarn scraps and snippets into that sat on my side table. I had an inspiration to create a pincushion to fit on TOP of the jar!!! Now that is brilliant!
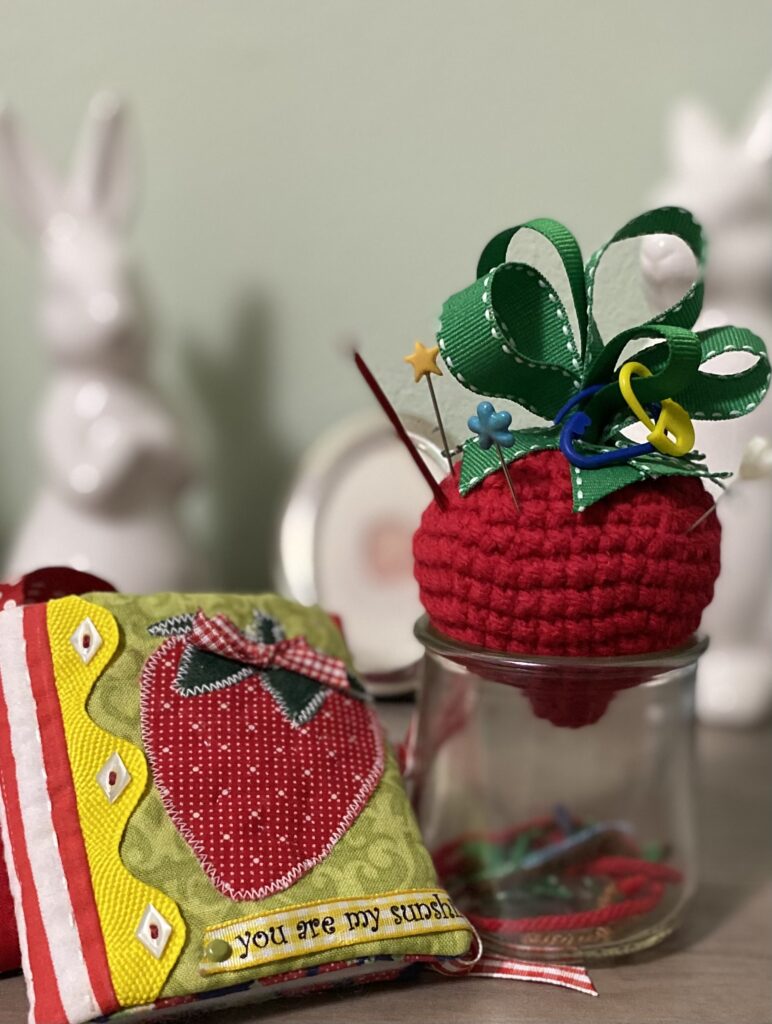
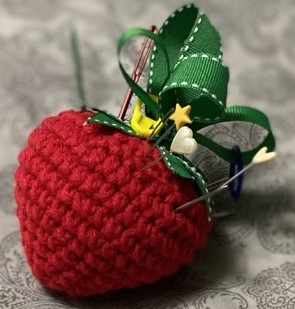
Personally, I LOVE strawberries… to eat and to decorate with. Their shape would be perfect to sit atop that little jar. The need to be able to take it off easily to use the jar as a tiny trashcan as well as the need for something to hang my stitch markers on inspired me to add the ribbon top. The adorable ribbons not only give it a CUTE factor, but are also functional.
This is a very simple pattern to follow and is perfect for the beginner crocheter. It is worked in the round with single crochet stitches. Use a stitch marker to keep up with your rounds.
Let’s quit dilly-dally-ing around and get to crafting!
This pattern is protected by copyright and cannot be sold or reproduced by any means. You are NOT allowed to share this pattern, but you ARE allowed to share the link to this website. MY photos are not allowed to be shared, but you ARE allowed to share photos of YOUR completed project. Video tutorials of this free pattern are NOT allowed. Selling finished items is permitted and encouraged. Please give credit for the pattern to me when sharing your creations on social media.
Supplies
- Yarn: I used 4/medium weight. You can use whatever you like. It doesn’t take much! I used: Red- Red Heart Super Saver / Pink- I Love This Yarn
- 3.75 or 4mm hook (according to your yarn and tension)
- Stitch Marker
- Yarn Needle
- 2 or 3 different Green grosgrain ribbons 3/8″ and 5/8″ (For pattern photos, I used 2 different ribbons: 1 of each size)
- Scissors
- Lighter
- Hot Glue
- Stuffing
Terms
MR: magic ring (If you cannot make a magic ring, use the “ch2 method”)
INC: increase
SC: single crochet
DEC: decrease (I use the invisible decrease)
I recommend the “yarn under” method to decrease the gaps in the stitches.
Crocheted Strawberry Pattern
R1: MR 5 SC (5) Leave a long tail to tie the ribbons onto
R2: INC around (10)
R3: SC around (10) Pull the MR tail tight and weave in a couple of times to secure the MR.
R4: INC around (20)
R5: SC around (20)
R6: SCx3, INC around (25)
R7: SCx4, INC around (30)
R8: SCx5, INC around (35)
R9: SCx6, INC around (40)
R10-11: SC around (40)
R12: SCx6, DEC around (35)
R13: SCx5, DEC around (30)
R14: SCx4, DEC around (25)
R15: SCx3, DEC around (20)
R16: SCx2, DEC around (15)
Cut long tail.
Add the ribbon top
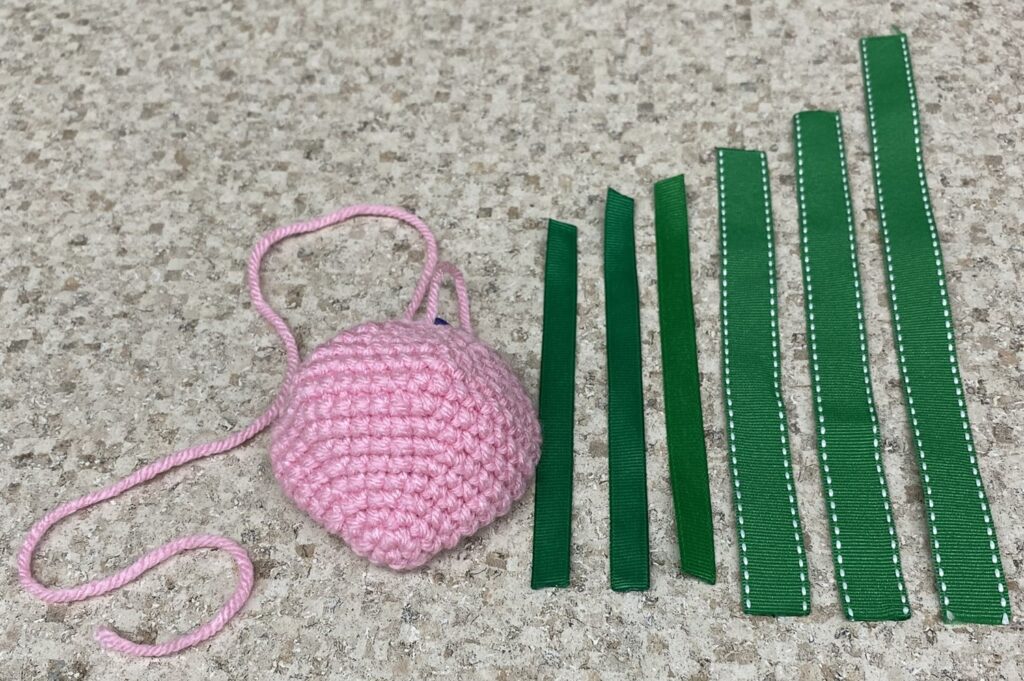
- Cut ribbons varying lengths from 3″ – 5″ for a total of 6 ribbons. Make sure to make one ribbon longer than the rest. Run your lighter across the ribbon ends to keep them from fraying.
- Bunch your ribbons and wrap the MR tail around them to secure down into the berry. It is easier if you flatten your berry. Carefully stuff the berry around the ribbons. DO NOT OVERSTUFF and be careful not to pull in the point of the berry.
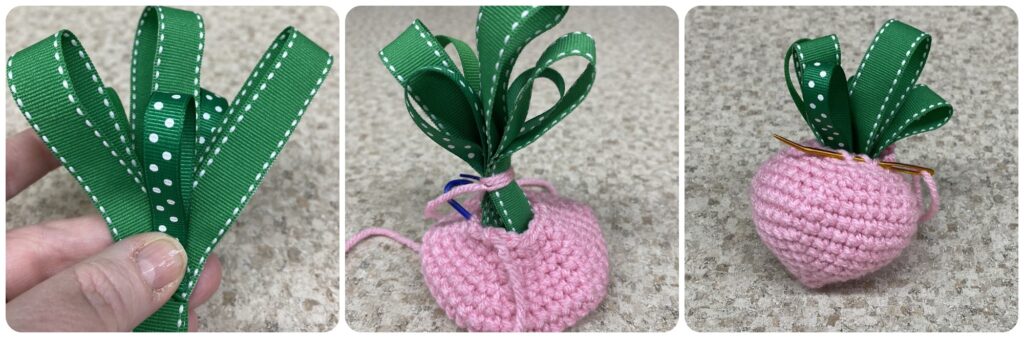
- Use your yarn needle to weave the last tail in and out of the front loops of R16. Pull to close, then fasten off your yarn.
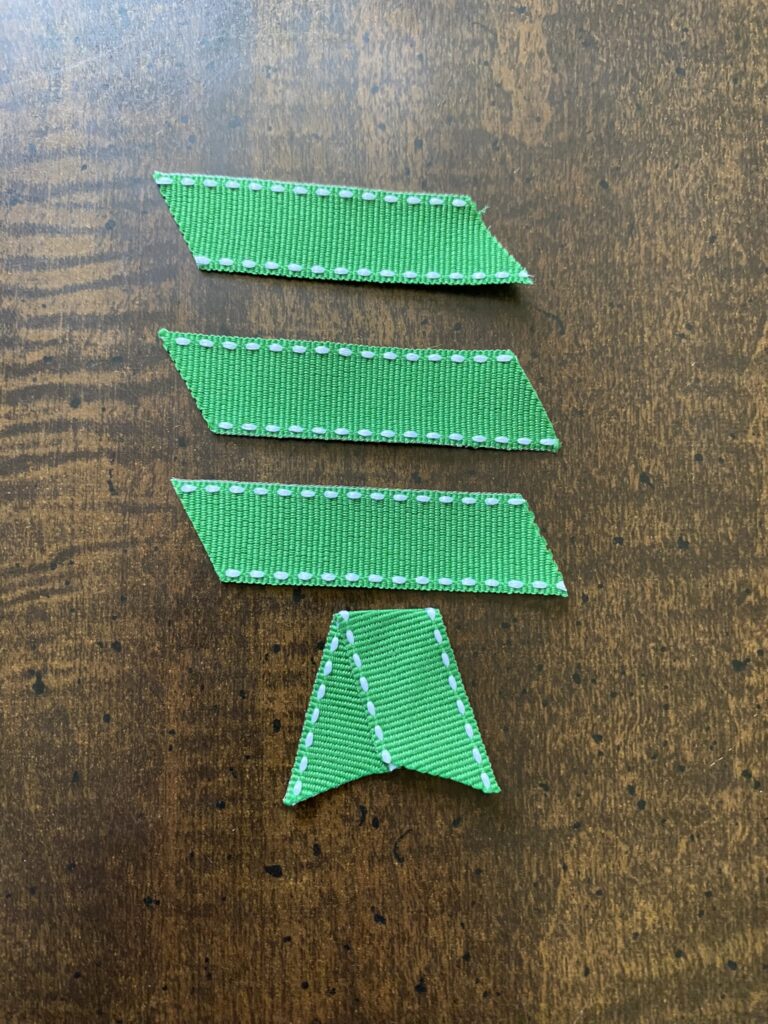
- Using 5/8″ ribbon, cut 4- 2 1/2 pieces on the diagonal with each end going in the same direction.
- Run your lighter across the ribbon ends to keep from fraying.
- Fold your 4 pieces in half to form a “V”. Hot glue inside the fold to secure, then glue around the berry.
I hope you have enjoyed this FREE crocheted strawberry pincushion pattern! Be sure to tag me so I can enjoy your creations on social media!!