
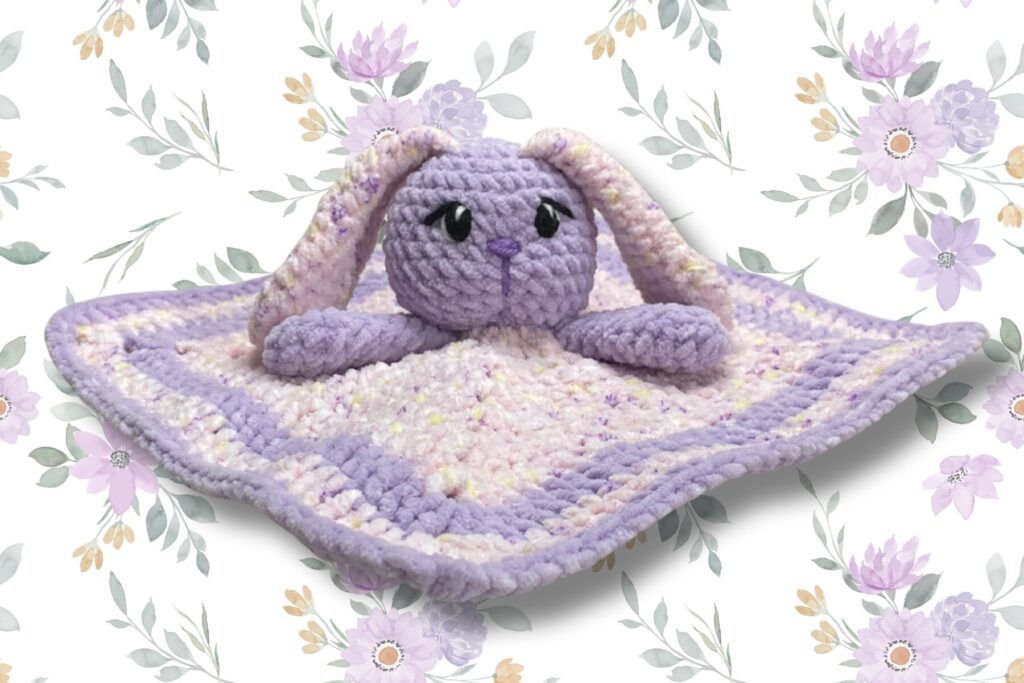
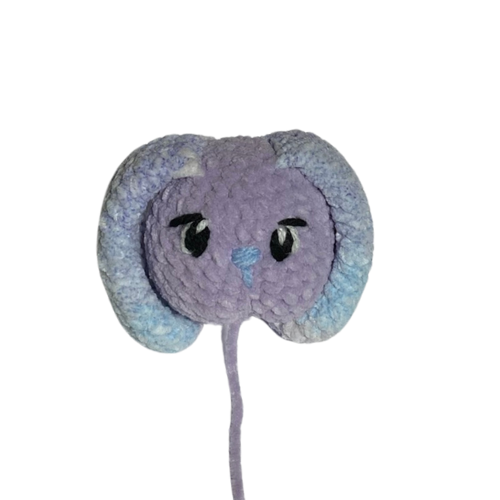
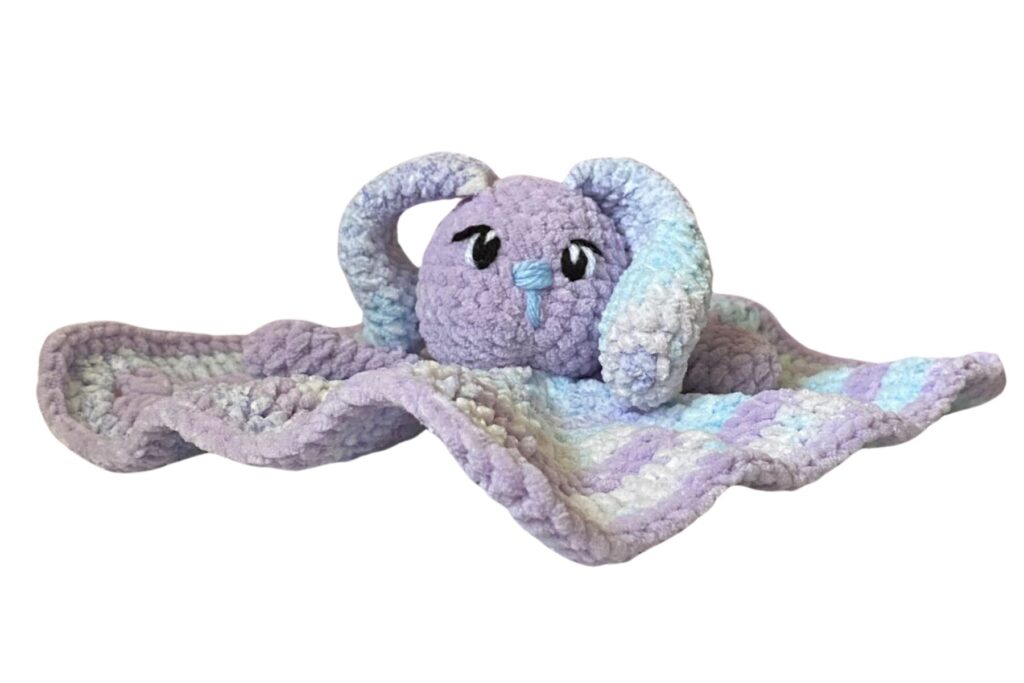
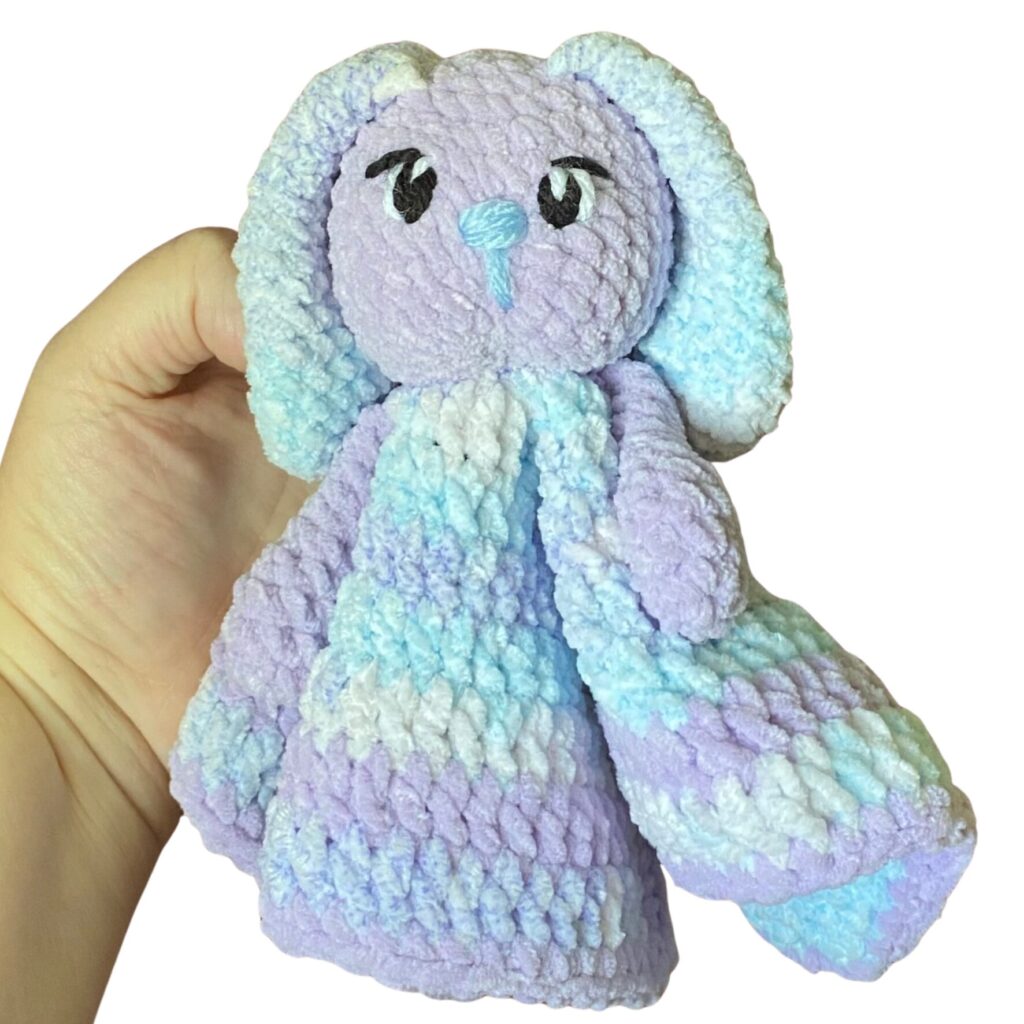
I’ve always had a soft spot for bunnies—especially those sweet lop-eared ones! So when it came time to design a new baby gift, I knew a bunny was the perfect choice. This tiny, free bunny lovey crochet pattern is extra special because it’s smaller than most loveys, making it just the right size for tiny hands to hold and snuggle. I’ve always loved creating baby gifts and tiny things, so this project combines both in the cutest way possible.
LOVEY: a small, cuddly blanket or stuffed animal that babies can use to feel safe and warm while sleeping. They are often used to help ease separation anxiety and can help babies become more independent. (Source: Google AI)
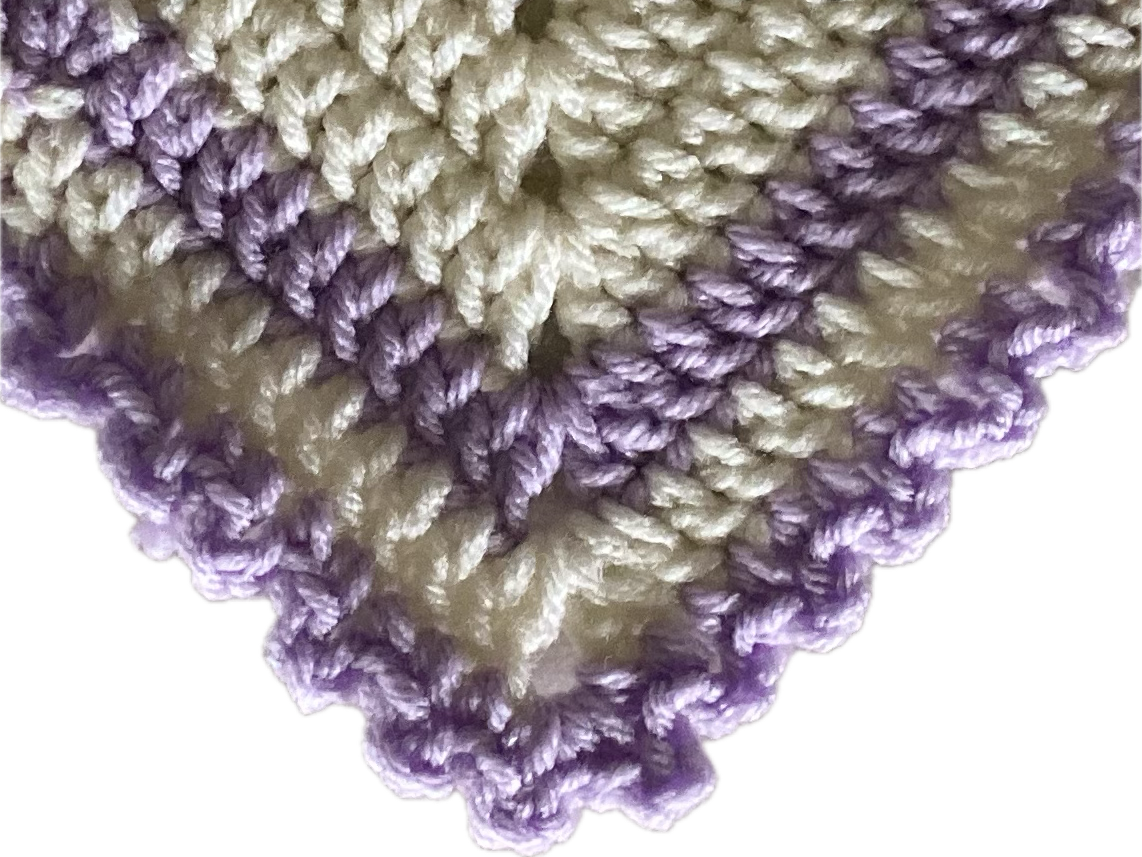
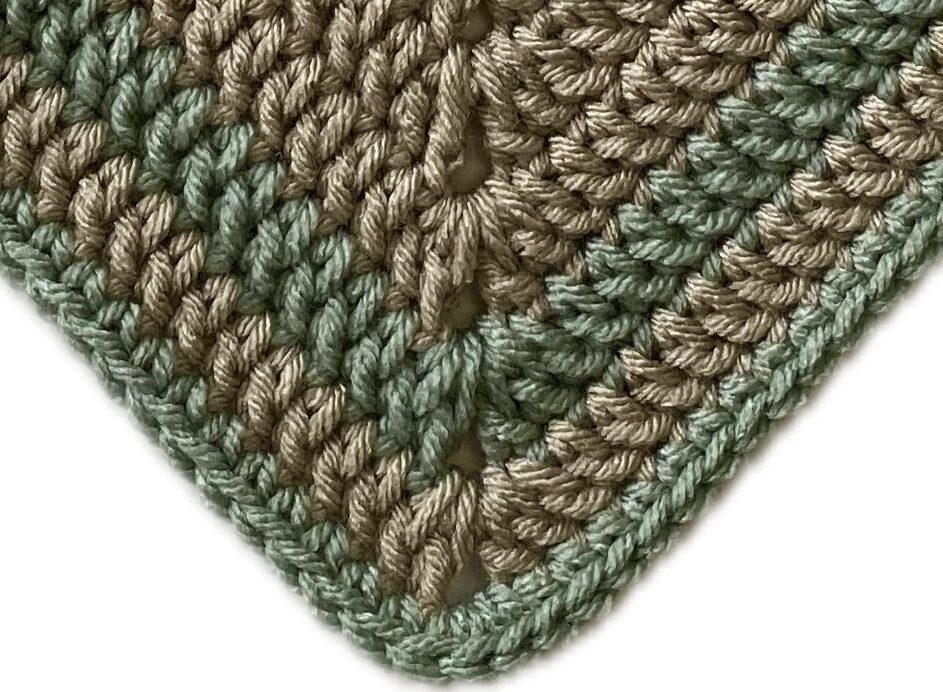
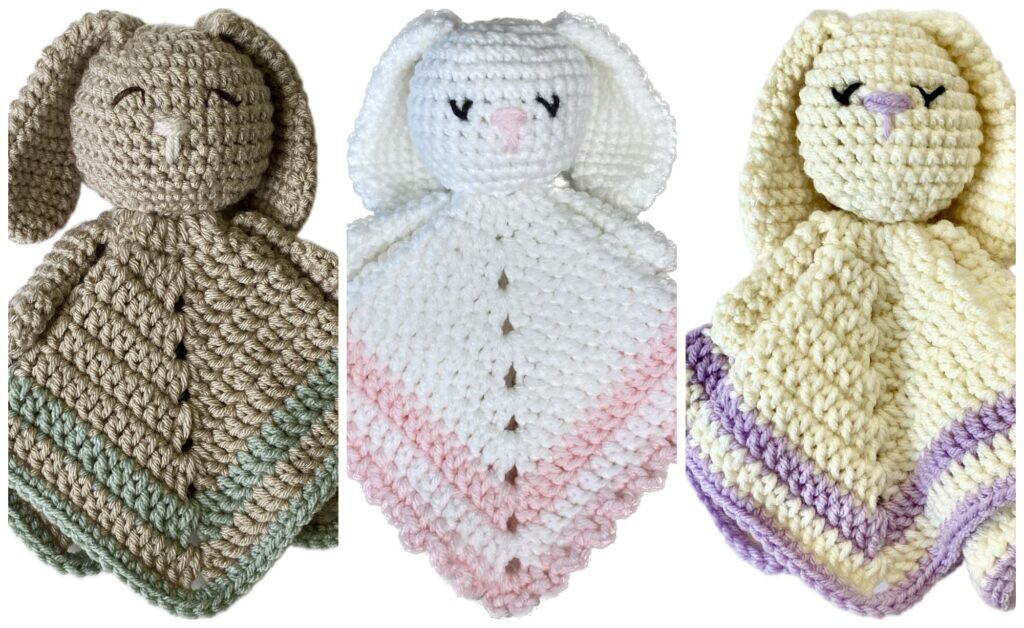 |
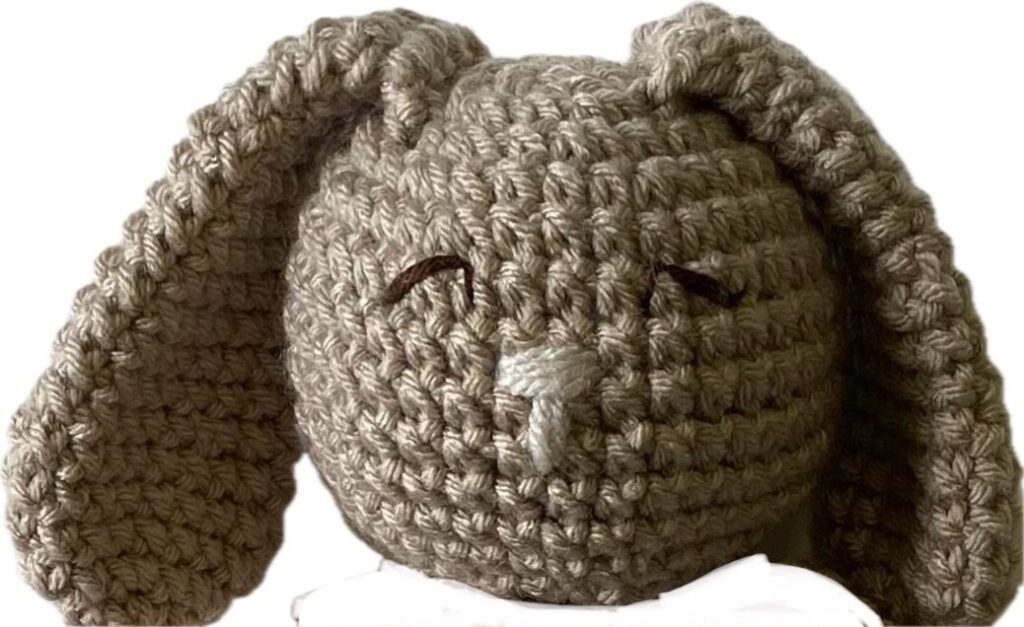
| Some of my first bunny lovey prototypes. |
This original pattern was first published last year. It has been and revised to make it even easier and cuter.
- The bunny ears now have a more symmetrical slope and are now crocheted on instead of sewn.
- The blanket itself has been rewritten where the seam is now in the corner making it even easier.
- I have also discovered the "magic knot" to change colors with no ends to weave in.
About this pattern
- This bunny lovey pattern is a great project for the beginner crocheter and is an easy crochet project.
- You can use worsted weight yarn for this lovey, but my favorite is Skinny Chenille. It can be used with the same hook size and just makes the lovey extra soft and baby-ish.
- There are two colors of yarn and you can change these up however you wish. You can use one main color for the bunny and most of the blanket, and the other color only for the trim- or mix it up and use a different color for the ears than the head/ paws and switch the colors on the blanket. No rules!!
- The head and paws are crocheted first, then sewn onto the blanket after it is finished.
- The bunny is crocheted in the round. The blanket it crocheted in rows.
- The blanket is a solid granny square with a round center.
- There are different options for the blanket trim.
- Finished size: Blanket is approx. 10" square. Finished lovey is approx. 9" tall.
Supplies
- Yarn: Medium/4 weight in 2 colors: Main and Trim. A small bit of Black for the eyes. You can use any color for the nose.
- Hook: 3.75mm
- Basic amigurumi supplies
Terms
- MR: magic ring
- CC: color change
- CH: chain
- SC: single crochet
- DC: double crochet
- HDC: half double crochet
- INC: increase
- DEC: decrease (use the invisible decrease)
- ST(S): stitch(es)
- SLST: slip stitch
- R/RND(s): round(s)
- FO: fasten off
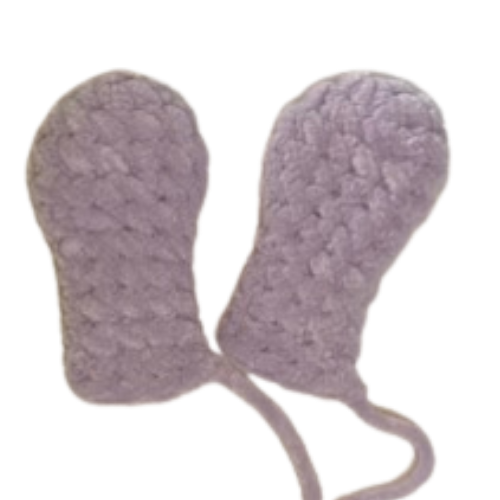
Ears (make 2)
- R1: With Main, MR 6 SC (6)
- R2: INC around (12)
- R3: (SC, INC)x6 (18)
- R4-6: SC around (3 rnds of 18)
- R7: SCx2, DEC, (SCx4, DEC)x2, SCx2 (15)
- R8-10: SC around (3 rnds of 15)
- R11: (SCx3, DEC)x3 (12)
- R12-14: SC around (3 rnds of 12)
- R15: SC, DEC, (SCx2,DEC)x2, SC (9)
- R16-17: SC around (2 rnds of 9)
- R18: DEC, SCx7 (8)
- R19: Pinch sides together and SC across (4)
- FO, leaving a 3-4” tail.
Paws (make 2)
- R1: With Main, MR 6SC (6)
- R2: INC around (12)
- R3-4: SC around (2 rnds of 12)
- R5: (SCx4, DEC)x2 around (10)
- R6: (SCx3, DEC)x2 around (8)
- R7-10: SC around (4 rnds of 8)
- R11: Pinch together and SC across (4)
- FO. Do not stuff.
- Leave a long tail for sewing.
Head
Worked from top to bottom in the round. The ears are crocheted on.
R1: With Main, MR 6 SC (6)
R2: INC around (12)
R3: SC, INC, (SC, INC)x2 attaching ear, SC, INC, (SC, INC)x2 attaching ear (18)

- R4: SC, INC, (SCx2, INC)x5, SC (24)
- Pull tails from ears inside and tie together in multiple knots. Be careful not to pull the tails too tight so as to distort the shape.
- R5: (SCx3, INC)x6 (30)
- R6-12: SC around (7 rnds of 30)
- R13: (SCx3, DEC)x6 (24)
- R14: SC, DEC, (SCx2, DEC)x5, SC (24)
- R15: (SC, DEC)x6 (12)
- Stuff head firmly, but DO NOT OVERSTUFF
- R16: DEC around (6)
- Cut a long tail and use needle to weave in and out of the front loops of R16. Pull tight to close. Weave the tail into the head a few times. Leave a long tail for sculpting and/or sewing.
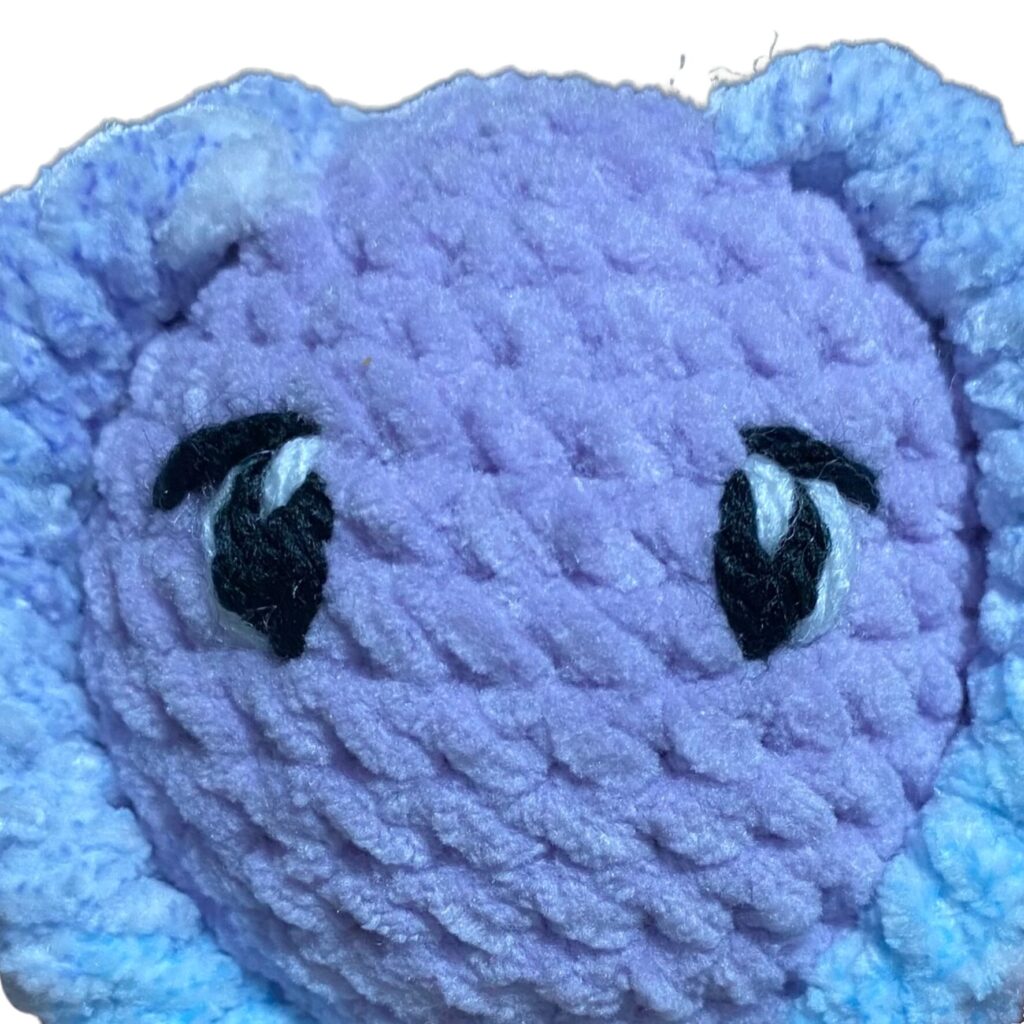
Facial Features
Eyes
ou will need to make embroidered eyes and nose for this lovey. Plastic “safety eyes” and noses are not safe for babies or children under 3 as they can be chewed off and become a choking hazard. There are several different options that are super simple and can be found on Instagram or YouTube. You can do sleepy eyes or open.
Use Black for the eyes and the nose.
The tops of the eyes will need to be between R6-7, and they will need to be 5 visible sts apart.
For open eyes, the bottom of the eyes will be between R8-9.
Here is a helpful video for making simple, open eyes.
This is the tutorial I used to make really cute sleepy eyes.
Head Sculpting (optional)
If you would like to make some puffy cheeks, take the long tail at the bottom of the head and insert it into the center stitch at the bottom of the eyes. Come out at the bottom again and pull tight. Repeat this one or two more times. Knot off at the bottom of the head and keep the tail for sewing.
Nose
Make the nose centered at the bottom of eyes. The cutest nose I made is only 1 st wide, but I have also made it up to 3 sts wide. First, make the mouth by coming out in the center st at the bottom of the eyes and insert needle 3 rows down. Make this pass again then come out at a side of the nose. Create the nose by passing over 1-3 sts enough times to create the nose you like.
Blanket
The blanket is a solid granny square, but modified to create a round base to sew the head onto.
Here is a wonderful, helpful video from B. Hooked that explains the solid granny square.
- R1: With Main, MR 12 DC. Join with a SlSt in the top of the first DC(12)
- R2: Ch3 (counts as the 1st DC throughout the pattern), DC in same st. INC around.
- Join to 3rd ch with SlSt. (24). Pull MR tight and FO and weave in end.
- R3: Here we are going to make the circle into a square.
- Ch5, 2DC in same st.(1st corner)- *DC-HDC-SC-HDC-DC* in the next 5 sts.
- [2DC, ch2, 2DC] in the next st (2nd corner made) Repeat *-* across.
- Make 3rd corner. Repeat *-* again.
- Make 4th corner. Repeat *-*, and end with a DC in the last st.
- Join to the 3rd ch of the Ch5. The first row of the solid granny square is complete.
The granny square begins...
- With each round, you will be enlarging your granny square.
- Each row adds 4 sts between corners.
- You will start and end each row in the same corner.
- The starting Ch5 is one DC and ch2 of the first corner.
- If you find your starting corner is larger than the rest, start over with only 4chs instead of 5.
Blanket cont...
- R4: SS into ch2 space. Ch5, 2DC into the same Ch2 space. DC across (9 sts.) Make your 2nd corner in the next ch2 space: [2DC, ch2, 2DC]. Continue the pattern. End with a DC in the ch2 space and join to the 3rd ch of the Ch5.
- R5: Repeat R4 with (13) DC between corners.
- R6: Repeat R4 with (17) DC between corners.
- R7: Repeat R4 with (21) DC between corners. When you SS at the end of the round, CC to Trim.
- Check out this Magic Knot by b.hooked for a clean color change with NO ends to weave in!
- R8: With Trim, Repeat R4 with (25) DC between corners. When you SlSt at the end of the round, CC to Main.
- R9: With Main, Repeat R4 with (29) DC between corners. When you SlSt at the end of the round, FO or CC to Trim.
Optional R10 - Trim: Pick an option below:
Trim Option #1: Loops
With Trim, Ch3. SC in next 2 sts: One “loop” made and another started. Repeat- around.
Corners: Make 2 “loops” into each corner. You may go into a corner with a Ch3 or come out of a corner with a Ch3 and that’s ok. Just continue the pattern. End with a SlSt in first ch.
FO. Weave in ends.
Trim Option #2: SC
With Trim, Ch1 (counts as first SC) and SC around. Make 3SC in each corner. Join with a SlSt to the Ch1. FO. Weave in ends.
Assembly
Face the blanket towards you on the diagonal, with the seam at the back.
Sew the paws on first. Line them up along the corners, between R2 and R3. Use the tails to whip stitch them on. Then weave the tails on the topside of the blanket toward each other and tie together in multiple double knots. Trim.
Sew the head onto the blanket between R1 and R2 using the long tail. After whip stitching it on, take your yarn through to the back of the blanket. Weave the tail
And now you have created a lovely gift for baby!
I hope you’ve enjoyed making this soft and snuggly tiny bunny lovey crochet pattern! Whether you're gifting it for a baby shower, tucking it into an Easter basket, or adding it to your handmade shop, this quick and easy crochet lovey pattern is sure to bring comfort and joy. If you love free crochet patterns for babies, be sure to check out my other amigurumi patterns, baby gift ideas, and seasonal crochet projects. Don’t forget to pin this free bunny lovey crochet pattern for later and share your finished makes with me — I’d love to see your adorable mini bunny loveys come to life!
Want MORE bunny patterns? Click Here!
Click for more handmade Baby Gifts!

.png)
.png)
