background

Monday, April 7, 2025

Easter Doorhanger on a Budget


When I started pulling out my spring decorations this year, I realized something was missing—an Easter doorhanger! I wanted something festive and inviting, but I didn’t want to spend a fortune. So, I grabbed a few affordable supplies from Walmart and the Dollar Tree and got to work. The result? A gorgeous, weathered, country-style creation that fits perfectly with my theme of an Easter Doorhanger on a Budget. If you're looking for a thrifty way to add some spring charm to your front door, this DIY is for you!


My Supplies

Every doorhanger starts with a good base. I couldn’t find one large enough at Dollar Tree, so I headed to Walmart and found a piece I loved—this ended up being my most expensive purchase.

I fell in love with the look of it right away. It reminded me of weathered wood boards from an old shed or fence, which became the inspiration for the rest of the design. In my mind, I could already see it painted sage green with antiquing gel for that rustic, muted look I was going for.

Next came the fun part: a little treasure hunt at Dollar Tree! I found a wooden chick, a couple of paper-covered eggs, the perfect burlap Easter ribbon, and several spring florals to build up the design.

Easter doorhanger with a baby chick, eggs and spring florals

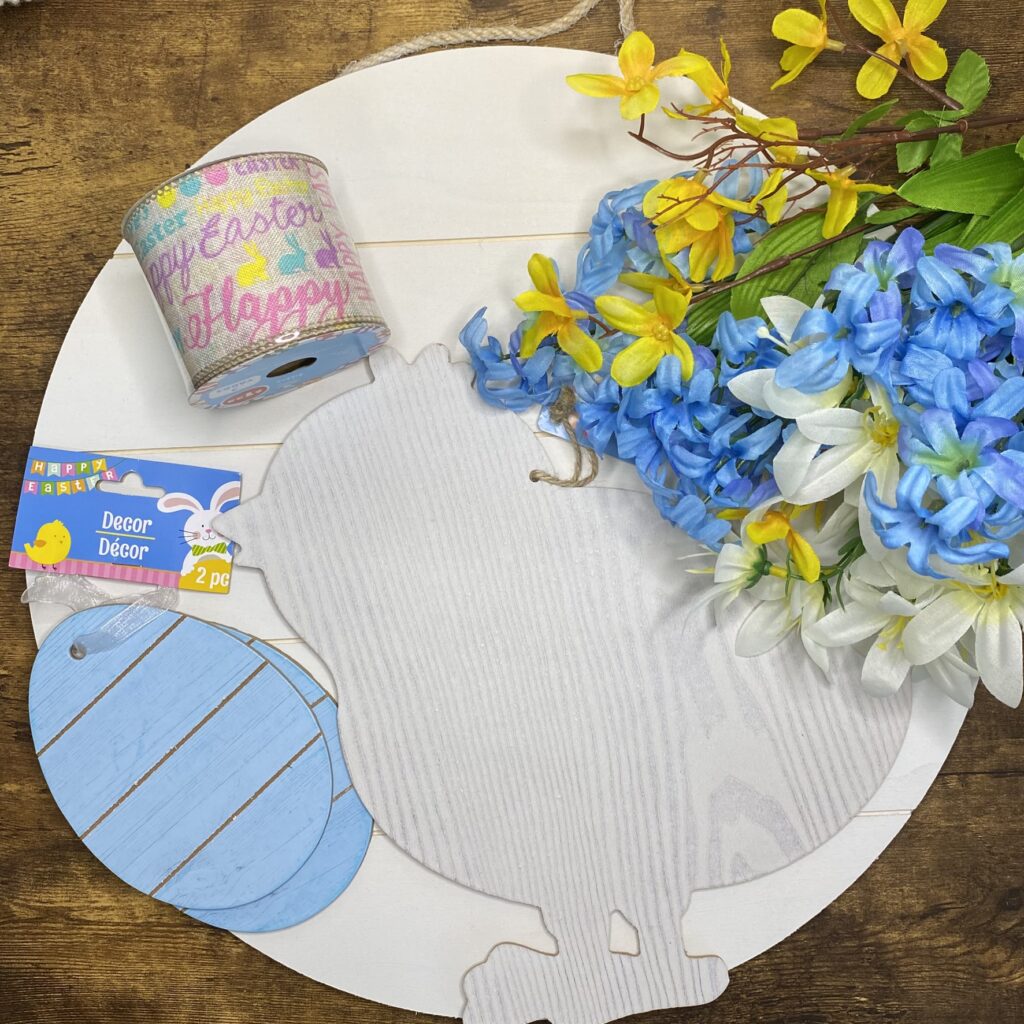
(By the way, I am not affiliated with Walmart of the Dollar Tree)


Steps

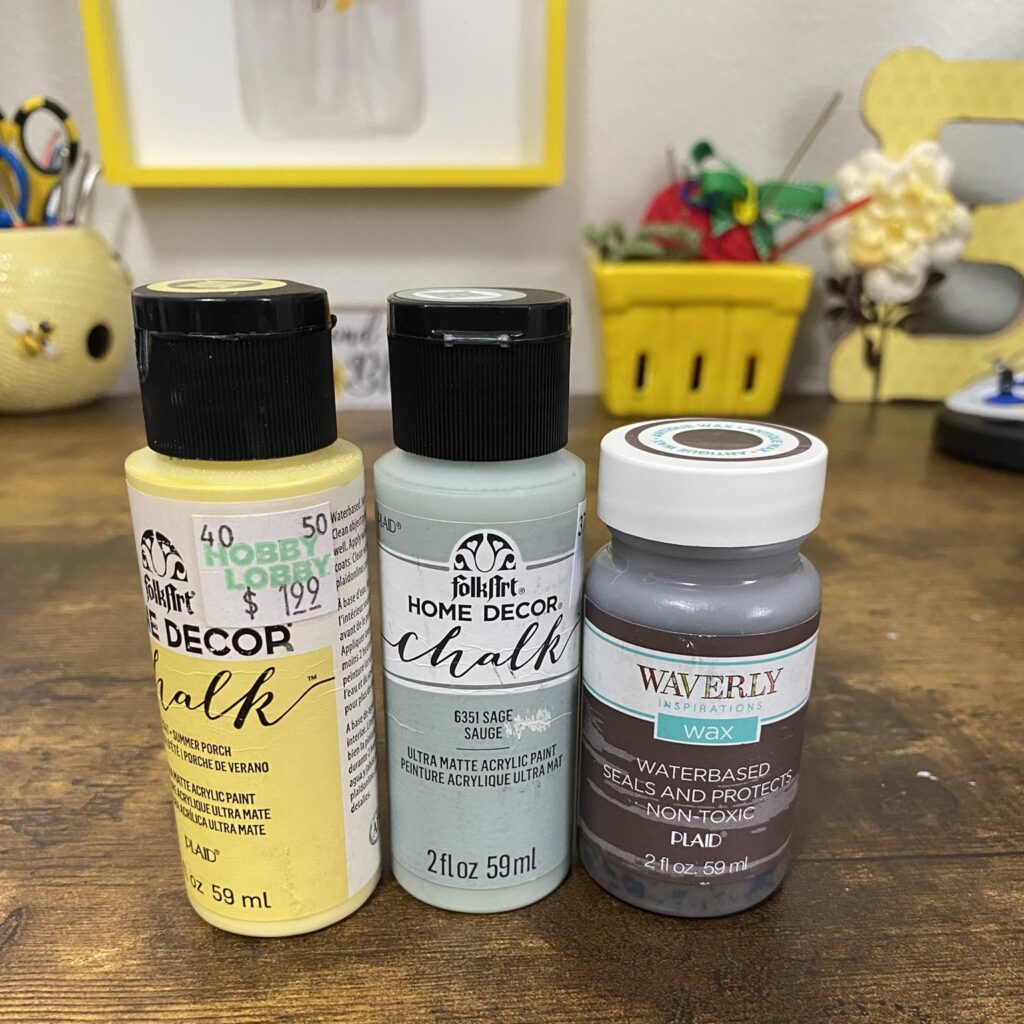
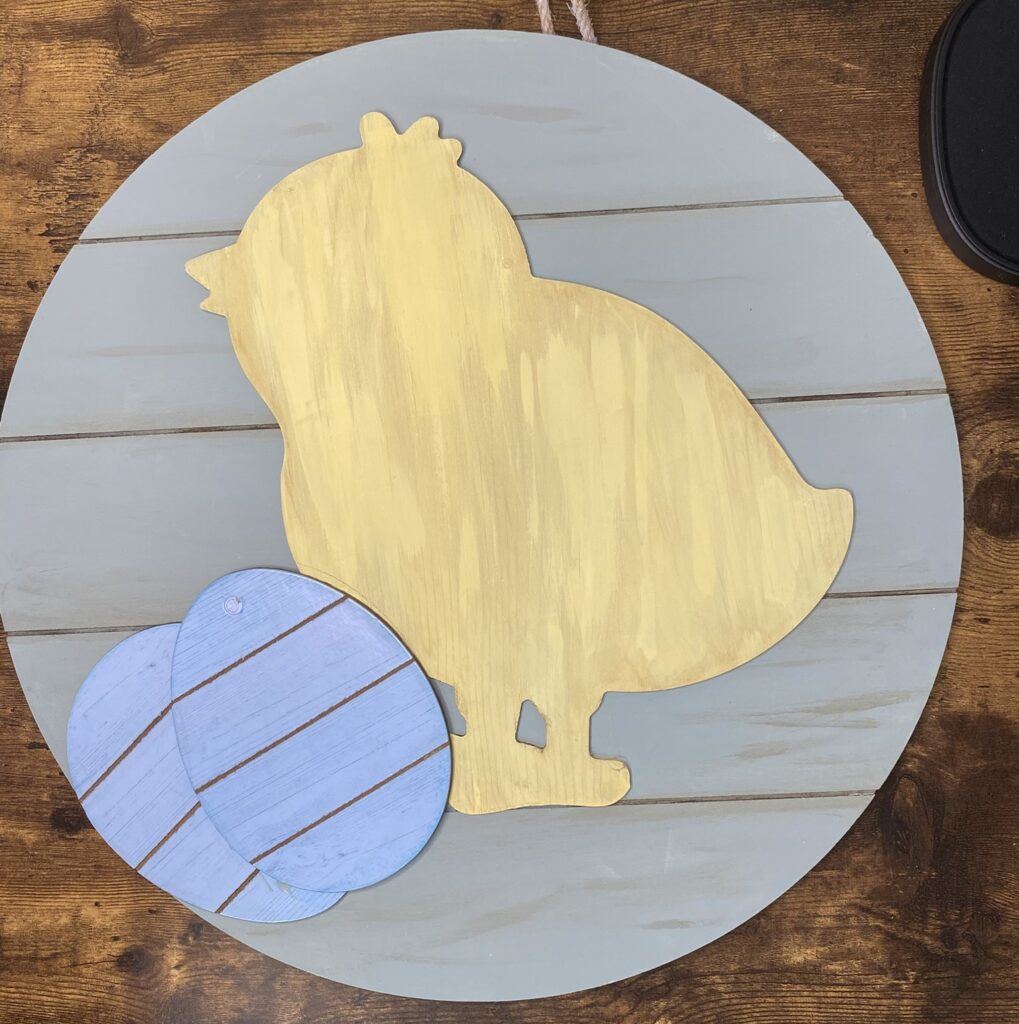
The first step in creating any doorhanger—especially one for outdoor use—is protecting the wood. I sprayed the base with two coats of white primer, front and back, to seal it well. I then painted it with chalk paint. Lastly I accented the edges and the grooves with antiquing wax.

The wooden chick had a hole at the top for hanging. To fill it, I placed a small piece of masking tape on the front and filled the hole from the back with hot glue (here is a short video.) Once dry, I painted it front and back with chalk paint. Lastly, I rubbed on some antiquing wax.

The eggs were already a perfect color thanks to the paper covering. I filled the hanging holes with hot glue and tried to color match one of the blues. It wasn't a perfect match, but from a distance, it blends in just fine! I used antiquing gel in the grooves and finished both the chick and eggs with chalk paint varnish to seal them.

Once everything was painted and dry, I adhered the chick and eggs onto the base with wood glue. I layered the pieces—first the chick and one egg, then the second egg slightly overlapping them. I used a few books as weights to keep everything in place while it dried.

a weathered rustic door hanger. a thrifty diy spring door hanger

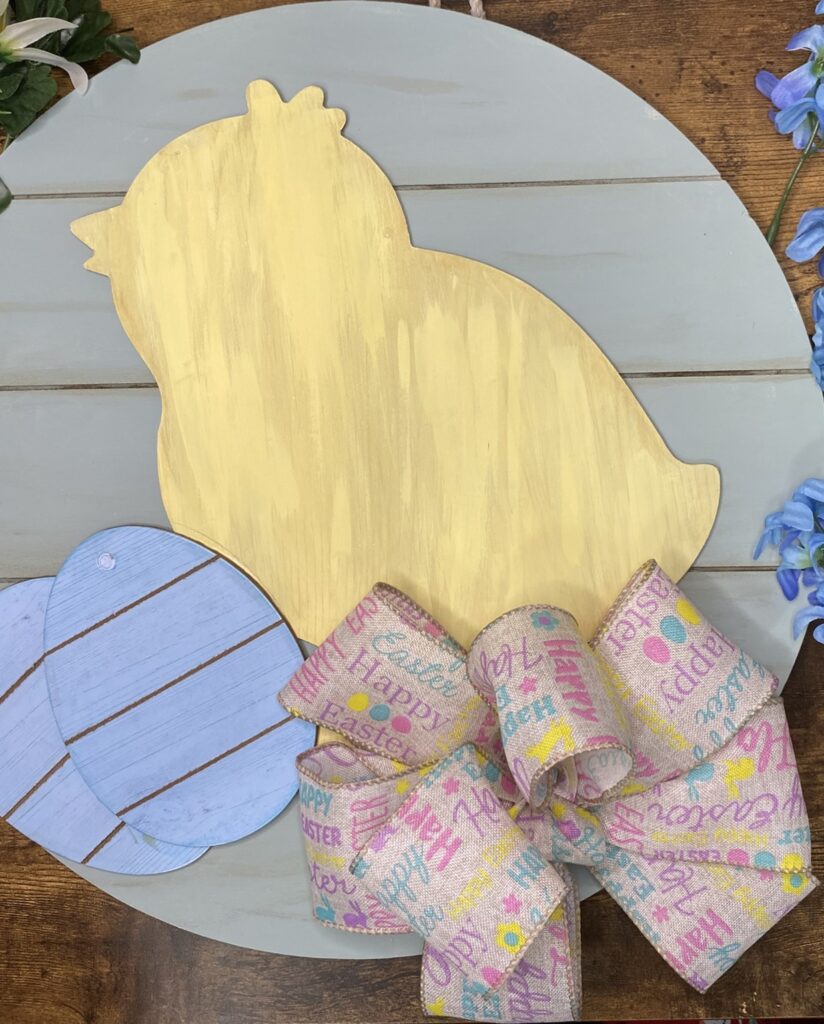
The final step was adding the bow and florals. I love to use this video to help me make the bow. Once It was made and glued in place using hot glue, I then added the flowers around it.


Thrifty can be Beautiful

It just goes to show—you don’t need a big budget to create something beautiful for your home. With a little creativity, some thrifty finds, and a dash of seasonal charm, you can bring the look of spring to your doorstep. This Easter Doorhanger on a Budget is proof that festive decor doesn’t have to be expensive to be eye-catching. I hope it inspires you to make your own and celebrate the season in crafty, budget-friendly style!

rustic spring door hanger cottage door hanger for easter

Click HERE for more Easter Ideas

Find more doorhanger ideas HERE

Sunday, April 6, 2025

Squishy Chickie: Free Crochet Pattern


Spring has officially sprung, and what better way to celebrate than with an irresistibly cute crochet project? Meet Squishy Chickie—a free crochet pattern that’s as fun to squish as it is to crochet! This little baby chick features a fluffy butt, feathery top, and squishable body that’s perfect for Easter baskets, spring décor, or just a dose of handmade cuteness. Whether you're a beginner or seasoned crocheter, this quick and easy project is sure to brighten your day.

easy Easter crochet pattern for baby chicken

About this pattern

This pattern is an easy, beginner friendly crochet pattern. You can use any yarn for this chick. I tried both Just Chenille from the Dollar Tree (not affiliated) and Baby Bee Adore-A-Ball from Hobby Lobby (also not affiliated.) My testers used Himalayan Dolphin Baby and Big Twist Posh. It works up pretty quickly and is NO SEW! These are some of my favorite qualities of a crochet pattern.

Supplies

  • Yarn: your choice in colors for Main and Contrast
  • Hook: appropriate size for your yarn choice
  • Optional: safety eyes
  • Basic amigurumi supplies

Terms and Abbreviations

  • B: 3DC bobble st
  • BLO: back loop only
  • CC: color change
  • CH: chain
  • DC: double crochet
  • DEC: invisible decrease
  • FLO: front loop only
  • FO: fasten off
  • INC: increase
  • MR: magic ring
  • R(s): round(s)
  • SC: single crochet
  • SS: slip stitch
  • ST(S): stitch(es)
  • {} a series of sts worked into the same st
  • () a repeat series of sts/ total R count
  • Work in continuous rounds.
  • I recommend the yarn under/yarn over method.

Pattern

  • R1: With Main color, 8SC in MR (8)
  • R2: (SC, INC)x4 (12)
  • R3: (SC, INC)x6 (18)

For each Bobble, CC to Contrast when finishing the st before. Then CC back to Main when pulling through all the loops of the Bobble. Work the Bobble in the FRONT LOOP and mark the back loop.

  • R4: Working in BLO:
    • SCx2, INC, SC, B, INC, SCx2, INC, B, SC, INC, (SCx2, INC)x2 (24) Pop out bobbles. FO Contrast.

Next round you will make the tail. Using the feet as a guide, make sure it’s centered at the back. Adjust sts as needed.

  • R5: SCx20, {in FLO: SS, CH6, SS, CH6, SS}, Ch6, repeat {} in the next st, SCx2 (24 +5 tail loops)
  • R6-7: SC around (2 rnds of 24)

In the next R you will be making the wings. They need to be about 1-2 sts back from the feet. Adjust sts as needed.

Mark the 1st and last HDC of each wing to keep them separate from the sts you will work in .

Wing: In FLO of the next st: {HDC, DC, CH2, SS in first CH, DC, HDC}. Wing sts are not counted in R total.

  • R8: SCx3, wing, SCx11, wing, SCx8 (24)
  • R -10: SC around (2 rnds of 24)
  • R11: (SC, DEC)x8 (16)

If using safety eyes, place between R9-10; 4-5 sts apart.

  • R12: (SCx2, DEC)x4 (12)

Start stuffing. DON’T overstuff!

  • R13: DECx6 (6)
  • R14: Make sure you are at the center back. Adjust sts if needed. {(CH 6, SS)x3}. Cut long tail. Finish stuffing. FO and use tail to weave hole closed.

Beak: Using Contrast, stitch the beak centered between the eyes with 3 sts.

squishy chickie crochet pattern side
squishy chickie crochet pattern back

That’s a Wrap on This Baby Chickie!

And there you have it—your very own baby chick, all finished and ready to be squished! This Squishy Chickie free crochet pattern is such a quick, fun little make, and I hope you had as much fun crocheting it as I did designing it. Whether it’s for a gift, spring décor, or just because you needed a fluffy-butt pick-me-up, I’d love to see your finished chickies! Tag me on social media or drop a pic in the comments.

This pattern is also available for free on my Instagram!

For more Easter ideas: click here!

Find more Spring ideas: click here!

For more free crochet patterns: click here!

How to Make Your Own Amigurumi Sticks

If you are a crocheter of amigurumi, you have probably heard of these sticks. If you haven't, Amigurumi sticks, sometimes called sewing...