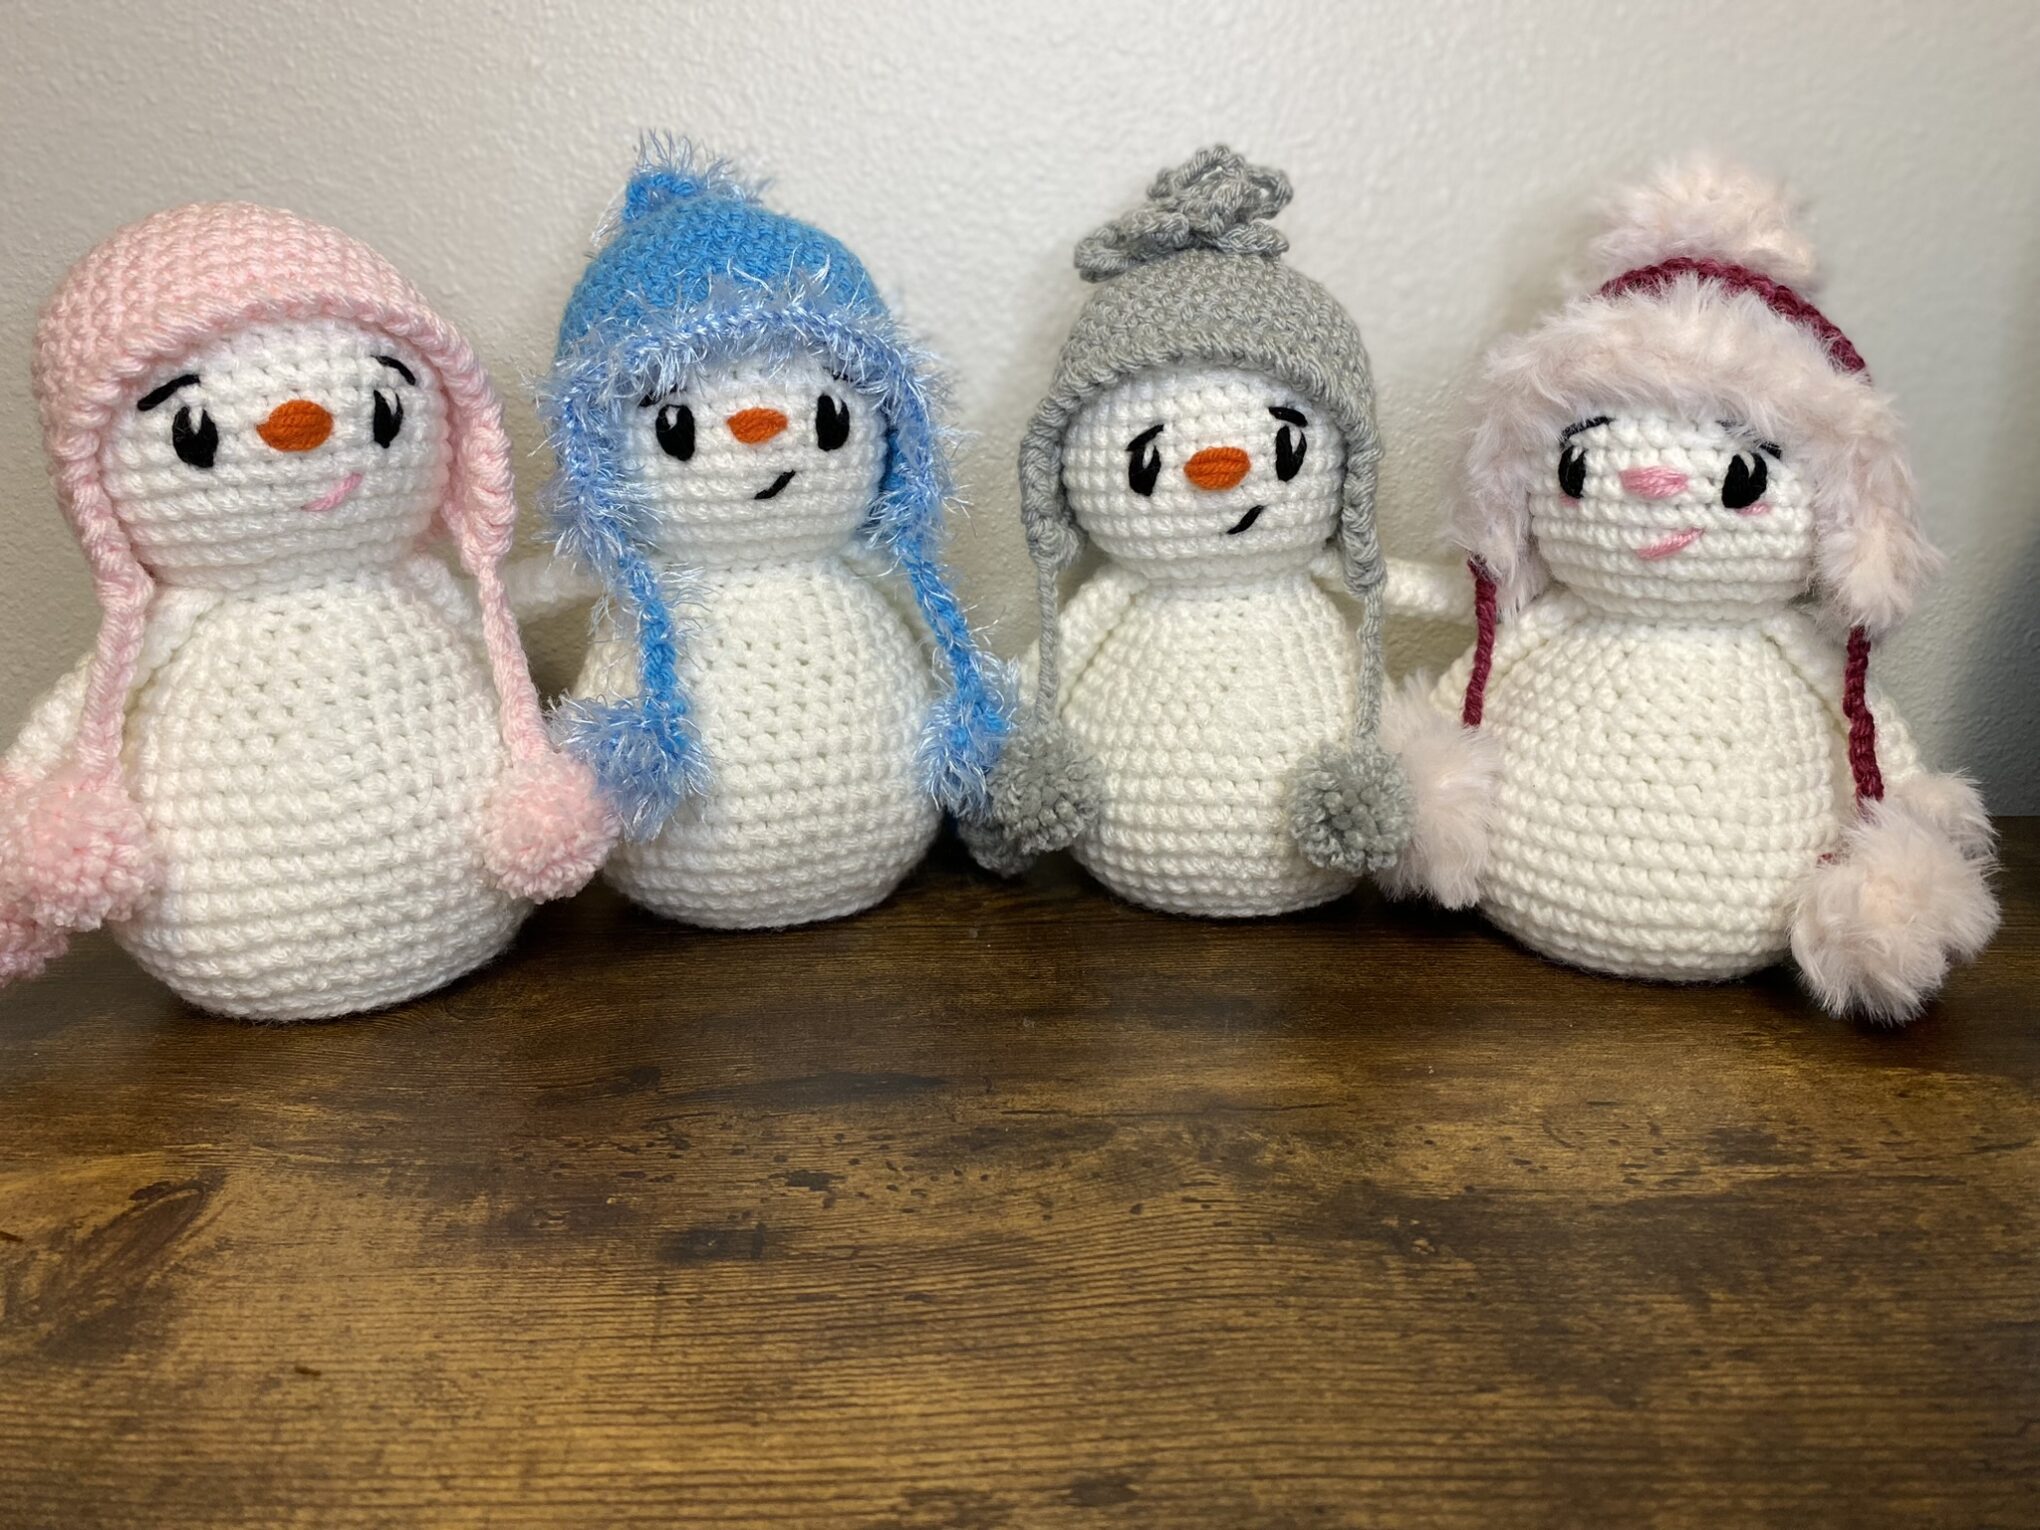
Free Snowman Crochet Pattern
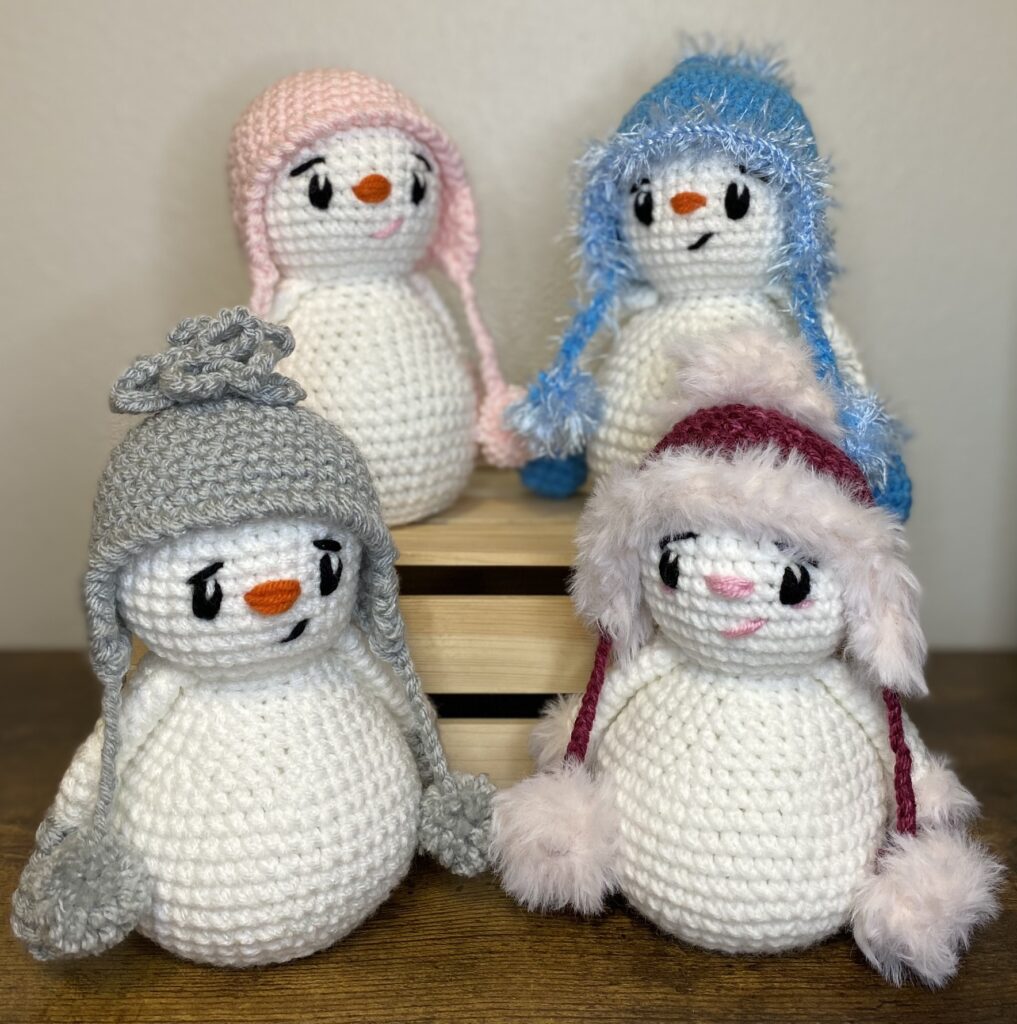
Embrace the cozy vibes of winter with this free snowman crochet pattern, perfect for beginners and experienced crocheters alike! This adorable, weighted amigurumi snowman makes a delightful holiday decoration or handmade gift. Whether it’s your first time crocheting a snowman or just expanding your amigurumi collection, you’ll love how cute and customizable this pattern is.
*** Disclaimer: Since first posting this free pattern, it has been revised. This is the 3rd revision 9/11/2025
About this pattern
When deciding on a design for this snowman, I knew the body of my Turkey Shelf Sitter pattern would be PERFECT for it (I love it’s pudgy-ness!)
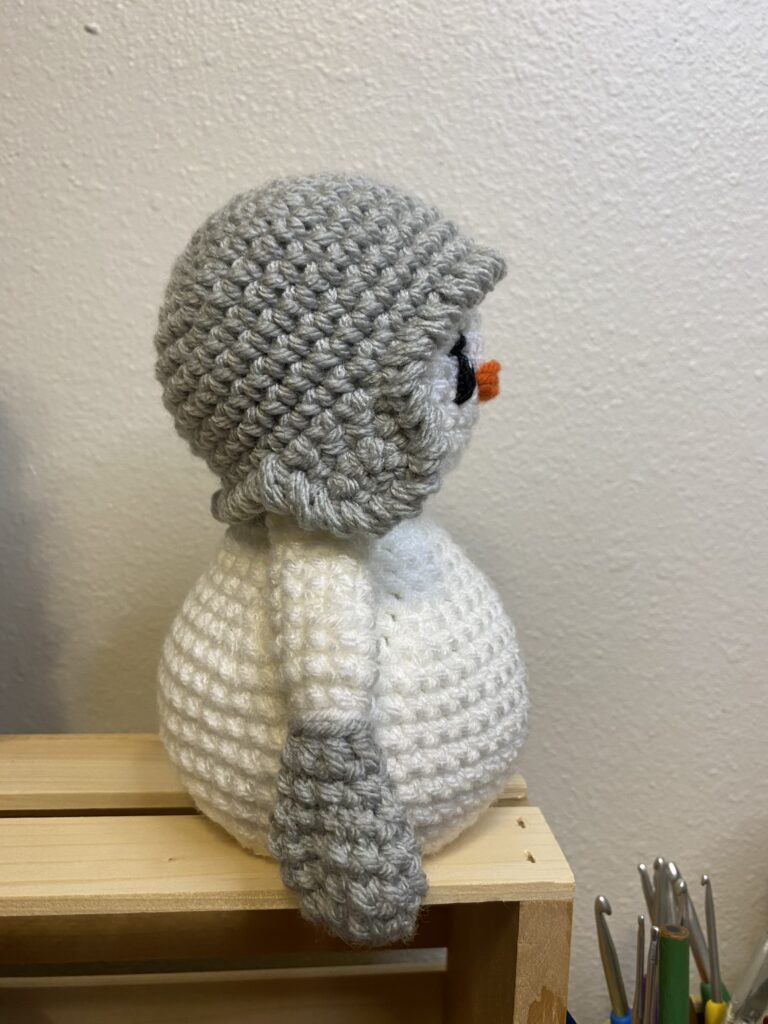
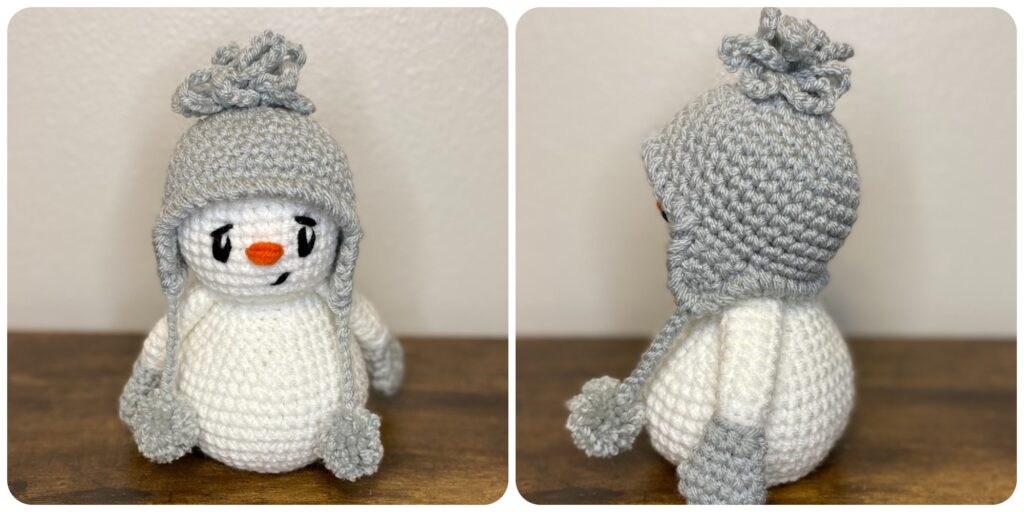
This little cutie has weight and is perfect to sit out as a decoration. It can be a snow”man” or snow”girl” with any colors/yarns you choose. I also wanted a different hat on my snowman pattern, and decided on an earflap beanie with several trim options.
Other features:
- Skill Level: Beginner
- No Sew Construction
- Worked in the round
- YouTube playlist of helpful videos
One thing I try to keep in mind as I create patterns, is the ability of the maker to use their own creative style in their creations. Therefore, I make suggestions, give a little guidance and then anxiously await to see what others do with it!!
Are you ready to make a crochet snowman using this free pattern??? Let’s GOOOOOOOOOO…
This pattern is protected by copyright and cannot be sold or reproduced by any means. You are NOT allowed to share this pattern, but you ARE allowed to share the link to this website. MY photos are not allowed to be shared, but you ARE allowed to share photos of YOUR completed project. Video tutorials of this free pattern are NOT allowed. Selling finished items is permitted and encouraged. Please give credit for the pattern to me when sharing your creations on social media.
Supplies
- Yarn: medium/4 weight in White, Black, Orange, and whatever color you choose for Mittens, Beanie & Trim (such as eyelash or fur yarn)
- Hook: 3.75mm (F)
- Optional: safety eyes 10 or 12 mm
- Canning jar lid or a piece of plastic
- Weights (I used poly beads) and something to put them in (such as a nylon footie)
- Pompom maker or 4 tined fork
- Basic Amigurumi Supplies
- Optional: Hot glue gun, 2 small elastic hair bands
Abbreviations and Terms
- SC: single crochet
- HDC: half double crochet
- INC: increase
- BLO: back loop only
- CH: chain
- ST(S): stitch, stitches
- R/RND(S): round, rounds
- Pattern for the body is worked in the round with no joins. Use a stitch marker.
- I recommend using the Yarn Under/ Yarn Over method.
Hands/Arms (make 2)
- R1: With Mittens, MR 6 SC (6)
- R2: INC around (12)
- R3: (SCx3, INC)x 3 (15)
- R4: SC around (15)
- R5: (SC, DEC)x 5 (10)
- R6: (SCx3, DEC)x 2 (8)
- R7: In BLO: HDC around (8)
- CC to White. FO Mittens.
- Stuff hands lightly.
- R8: In BLO: SC around (8)
- R9-16: SC around (8 rnds of 8)
- R17: Pinch top of arm together and SC through both sides across (4)
- FO leaving a 3-4″ tail. Leave as is or choose a trim:
Optional Eyelash yarn: Wrap around R7 until you get the fullness you like. I wrapped mine about 10 times.. Tie ends together, then pull through to the other side of the hand and trim. Optional: you may want to hot glue the yarn to keep it in place. I did not.
Optional Fur yarn: Cut two 8in pieces of Fur yarn. Using your hook, pull an end through the mitten in the HDC row where the color change jog is. Being careful to keep the fabric of the yarn next to the mitten, wrap the yarn around twice. Tie ends together. Pull both ends through to the other side. Pull taut and trim. Repeat on other hand. Optional: you may want to hot glue the yarn to keep it in place. I did not.
Body
- R1: With White, MR 6 SC (6)
- R2: INC around (12)
- R3: (SC, INC)x6 (18)
- R4: (SCx2, INC)x6 (24)
- R5: (SCx3, INC)x6 (30)
- R6: (SCx4, INC)x6 (36)
- R7: In BLO: SC around (36)
- R8: (SCx5, INC)x6 (42)
- R9: SCx3, INC, (SCx6, INC)x5, SCx3 (48)
- R10-14: SC around (5 rnds of 48)
- R15: SCx3, DEC, (SCx6, DEC)x5, SCx3 (42)
- R16: (SCx5, DEC)x6 (36)
- Place lid into base. It can be hot glued if preferred.
- R17: SCx2, DEC, (SCx4, DEC)x5, SCx2 (30)
- R18-19: SC around (30)
- Add in weights surrounded by stuffing.
- R20: (SCx3, DEC)x6 (24)
- R21: SC, DEC, (SCx2, DEC)x5, SC (18)
- R22: SC around (18)
- In the next round, you will be crocheting the arms on. You will hold the arm against the body (making sure the CC will be against the body) and crochet through both the arm and the body sts.
- R23: SCx2, SCx4(attaching arm,) SCx6, SCx4(attaching arm,) SCx2 (18)
- Continue stuffing up to the last round. Pull the tails from the arms inside and tie them together in multiple double knots. Be careful not to pull them too tight and distort the shape. Trim the ends.
Head
- R24: INC around (36)
- R25-33: SC around (9 rounds of 36)
- If using safety eyes, add them between R28-29, 5 visible sts apart.
- Stuff neck and start stuffing head. It will need to be stuffed firmly so as to have a full, round shape.
- R34: SCx2, DEC, (SCx4, DEC)x5, SCx2 (30)
- R35: (SCx3, DEC)x6 (24)
- R36: SCx2, DEC, (SCx4, DEC)x5, SCx2 (18)
- R37: (SC, DEC)x6 (12)
- R38: DEC around (6)
- Finish stuffing head.
- Cut a long tail. Using a yarn needle, weave the tail through the front loops of R38. Pull tight to close. FO and hide end.
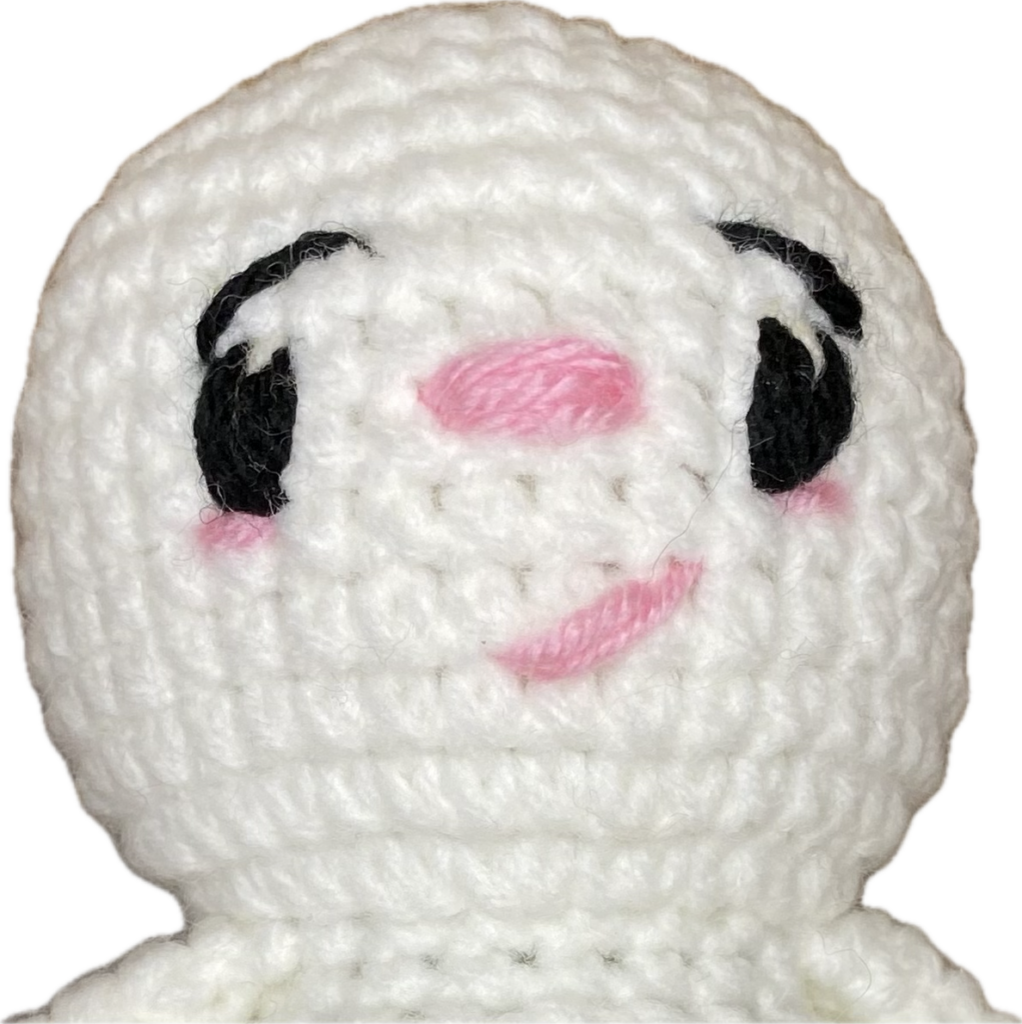
Make embroidered eyes, nose and mouth using videos from this playlist.
Beanie
Use the YO/YO method.
- R1: With Beanie, MR 6 SC (6)
- R2: INC around (12)
- R3: (SC, INC)x6 (18)
- R4: SC, INC, (SCx2, INC)x5, SC (24)
- R5: (SCx3 INC)x3 around (30)
- R6: SCx2, INC, (SCx4, INC)x5, SCx2 (36)
- R7-11: SC around (5 rnds of 36)
- In the next round you will be making the earflaps of the beanie.
- Earflap (EF):
- *Turn, CH1. SC in the same st and the next 3 sts.*
- Repeat *-* 2 times.
- Turn. DECx2.
- SSx4 down the side of the earflap.
- R12: SCx10, EF, SCx20, EF, SCx6
- Continue to trim…
Trim Options
1 – Twisted SC:
- R13: Make a round of twisted SC around beanie and earflaps. SlSt with first st. Tie off.
2 – Eyelash Yarn:
- R13: If using eyelash yarn, trim Beanie and bring up the eyelash yarn. Tie ends together. Make 2SC in each st around hat and earflaps. SlSt with first st. Tie off.
3 – Fur Yarn:
- R13: If using fur yarn, trim Hat and bring up fur yarn. SC with fur yarn around hat and earflaps. SlSt with first st. Tie ends together.
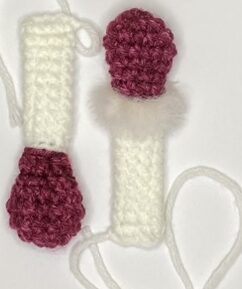
Ties
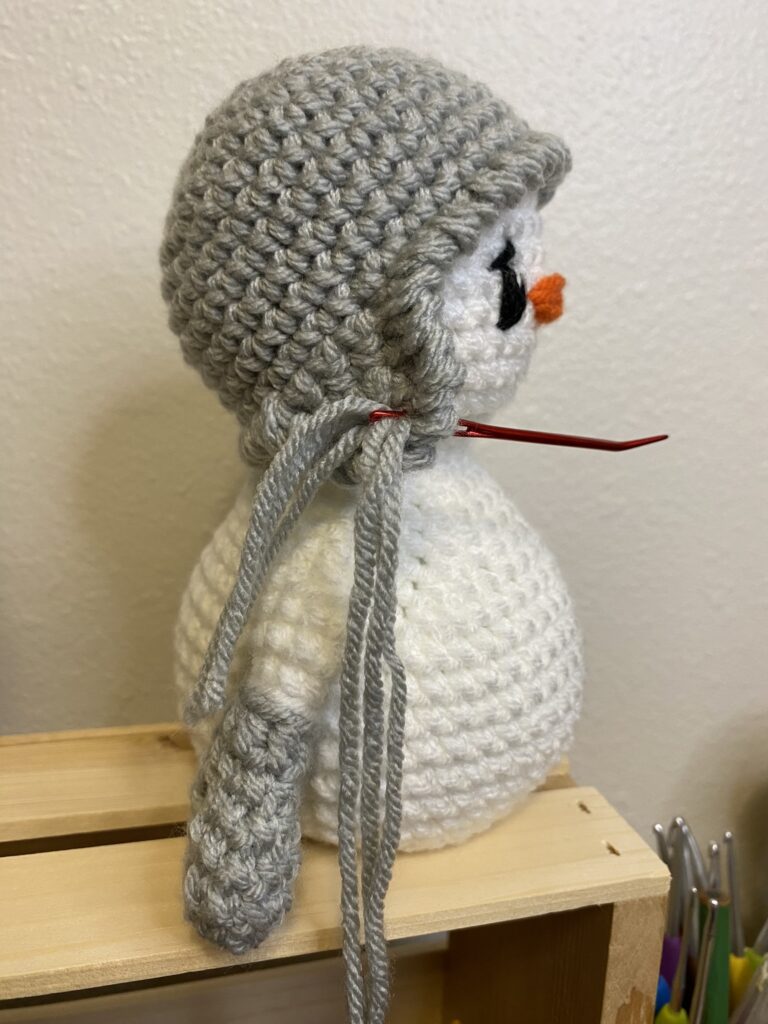
Cut 3- 12″ pieces of Beanie. Pull all 3 strands through the bottom of the earflaps so that the pieces are even on both sides. Divide the 6 stands into 3 sets of 2 and braid all the way down. Secure the tail with a small elastic band or a piece of yarn.
If using Eyelash yarn: add 3 strands of eyelash yarn in with the regular yarn and when dividing, make sure you pair 2 eyelash yarn strands with the 2 regular strands.
Pom Poms
Follow the video from the playlist to make your pom poms and then attach them to your braid. Also make one for the top of the hat.
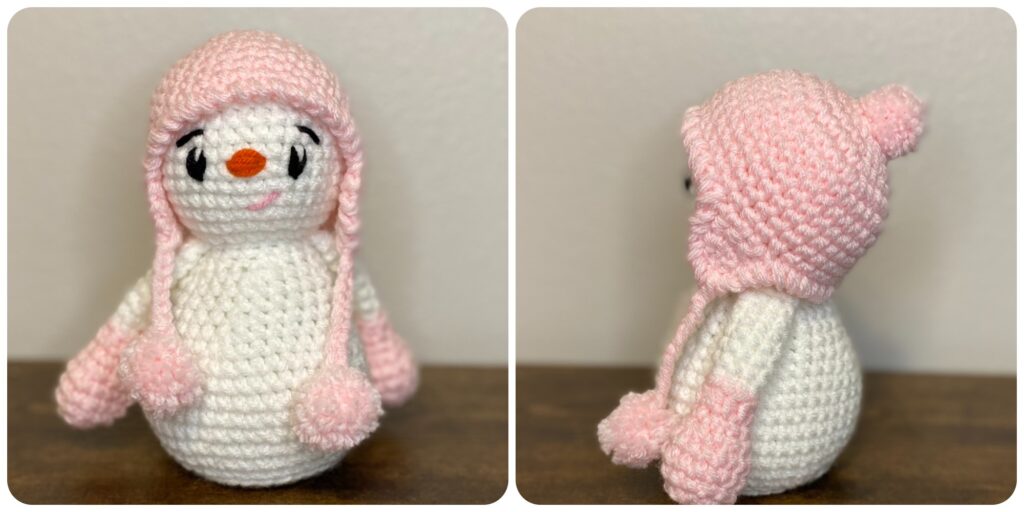
If using Eyelash yarn, be sure to follow that video to make pom poms. You can also use the Fur yarn, but only wrap it 10Xs.
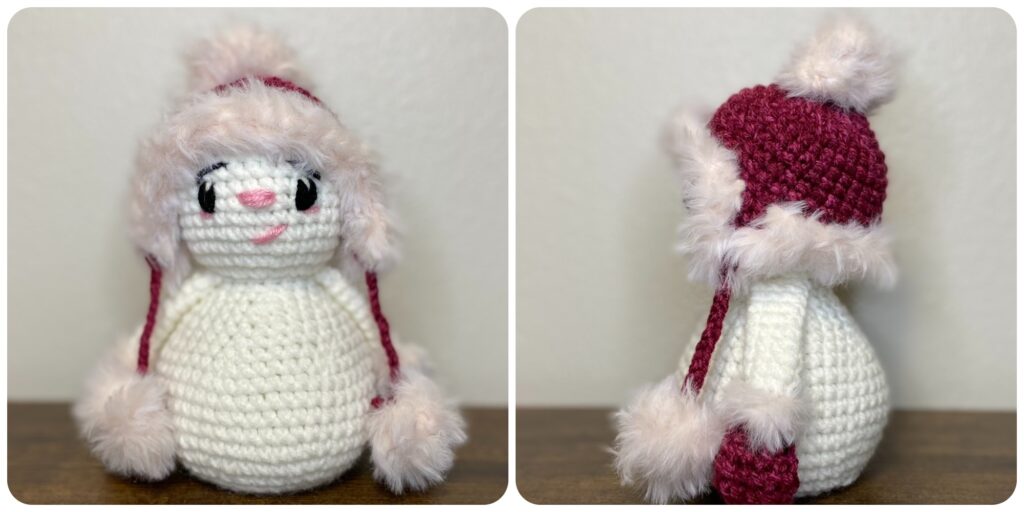
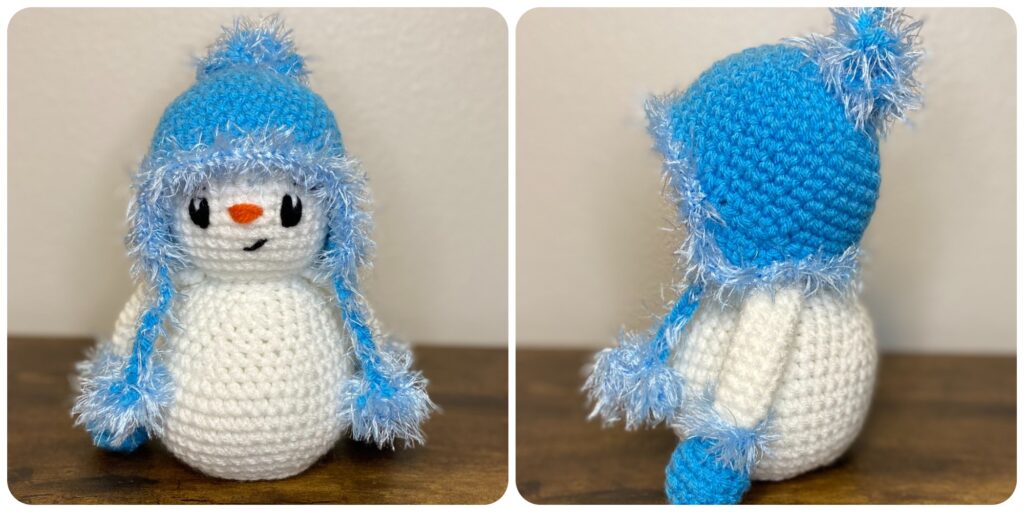
To make a Loopy pom for the top of the hat, follow this video. If using fur yarn, only make 6 loops of 6 chains.
That’s it!!
And that’s it—your very own crochet snowman is ready to bring a little extra winter cheer! Whether you’re making this pattern as a festive holiday decoration, a handmade gift, or just for fun, it’s sure to melt hearts. I’d love to see your finished creations, so feel free to share them and tag me on social media. If you enjoyed this free crochet snowman pattern, be sure to check out my other free patterns here on the blog for even more cozy makes.